Mini canvases are honestly one of the best crafting formats for kids, since the small size means a project doesn’t drag on past their attention span, and a finished piece is just the right size to tape up on the fridge or prop on a shelf without taking over the whole room.
Here are 17 ideas built around techniques kids can actually handle themselves, handprints, fingerprints, dabbing, and simple shapes, without needing steady fine motor control they haven’t quite developed yet.
A Few Notes Before You Start
Washable, non-toxic kids’ paint is worth seeking out specifically, since regular acrylic can be tough to get out of clothes and skin, and washable paint still gives plenty of solid color for these projects.
Cover the workspace with newspaper or an old tablecloth before starting, and if you’re doing any handprint or footprint designs, keep a damp cloth or wipes within reach for quick cleanup between steps.
Smaller canvases, somewhere around four by four inches or five by seven inches, work best for most of these so a kid isn’t stuck filling a huge blank space. And give every finished piece plenty of time to dry flat before it gets stacked, hugged, or handed to a sibling to admire.
1. Handprint Sunflower
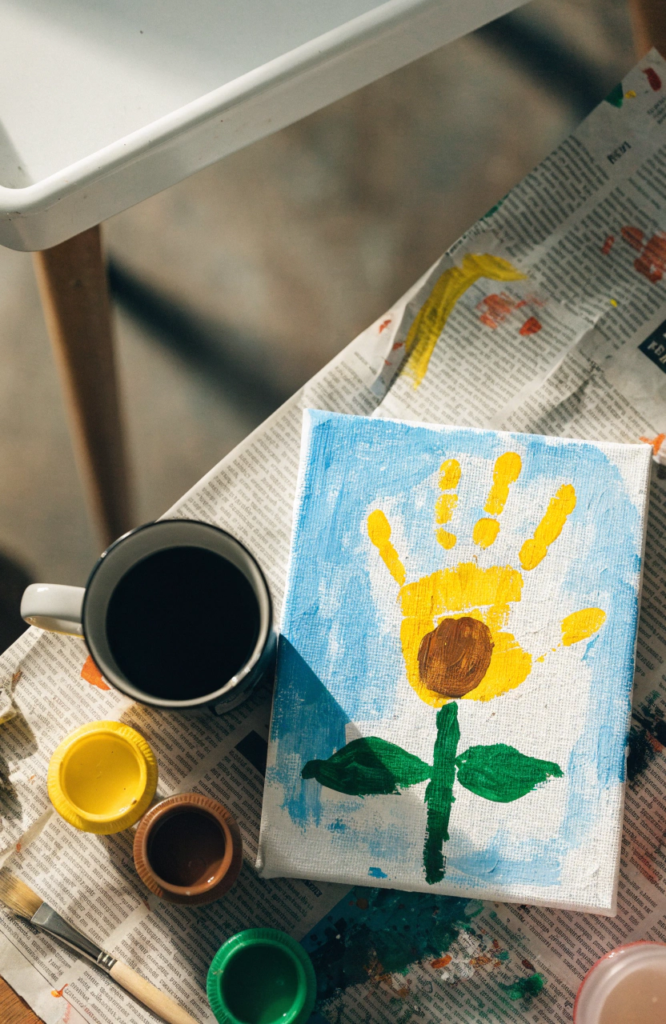
One handprint becomes the petals, and a simple brown circle becomes the center, so this one comes together fast even for a kid who’s still getting used to holding a brush.
Materials: washable paint (yellow, brown, green), small canvas, paintbrush
Steps:
- Paint a light blue or white background and let it dry.
- Paint a kid’s palm and fingers yellow, keeping the fingers spread wide.
- Press the hand firmly onto the lower half of the canvas to create the petal shape.
- Once dry, paint a brown circle over the base of the palm print to form the flower’s center.
- Add a simple green stem and a couple of leaves below the print.
2. Fingerprint Tree
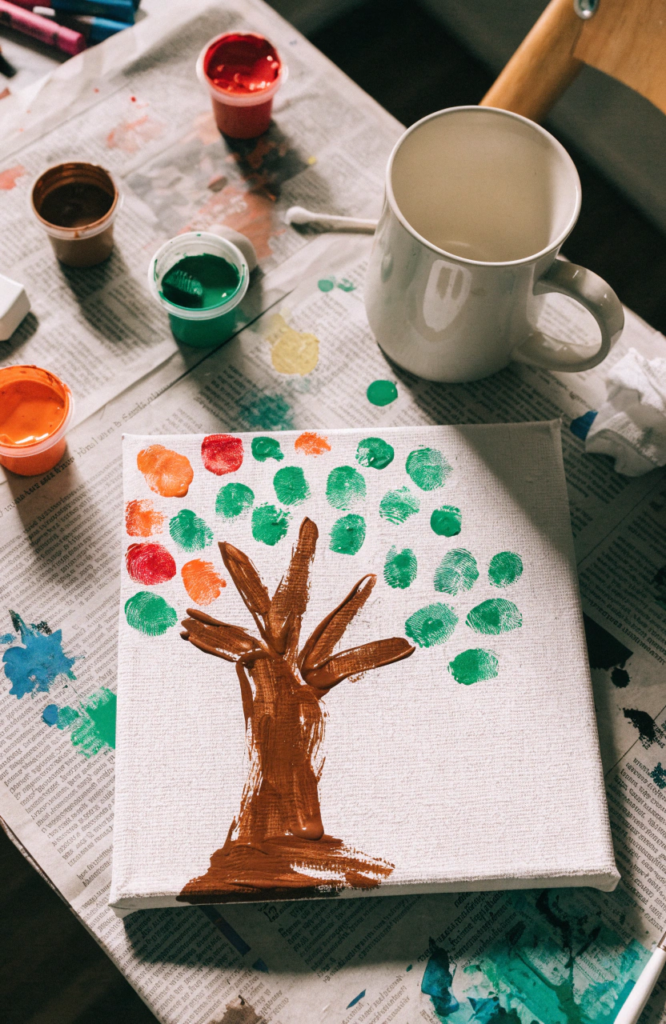
A brown trunk and a whole bunch of fingerprint dots for leaves, this one’s great for younger kids since there’s really no way to mess up a fingerprint.
Materials: washable paint (brown, green, and a few other colors for extra fun), small canvas, cotton swab or fingertip
Steps:
- Paint a simple brown trunk with a few branching lines near the top.
- Let the trunk dry completely before moving on.
- Dip a fingertip into green paint and press it around the branches to build up a cluster of leaf dots.
- Mix in a couple of other colors like red or orange for a more autumn-inspired look if you’d like.
- Let the whole canvas dry flat before handling.
3. Simple Rainbow Arch
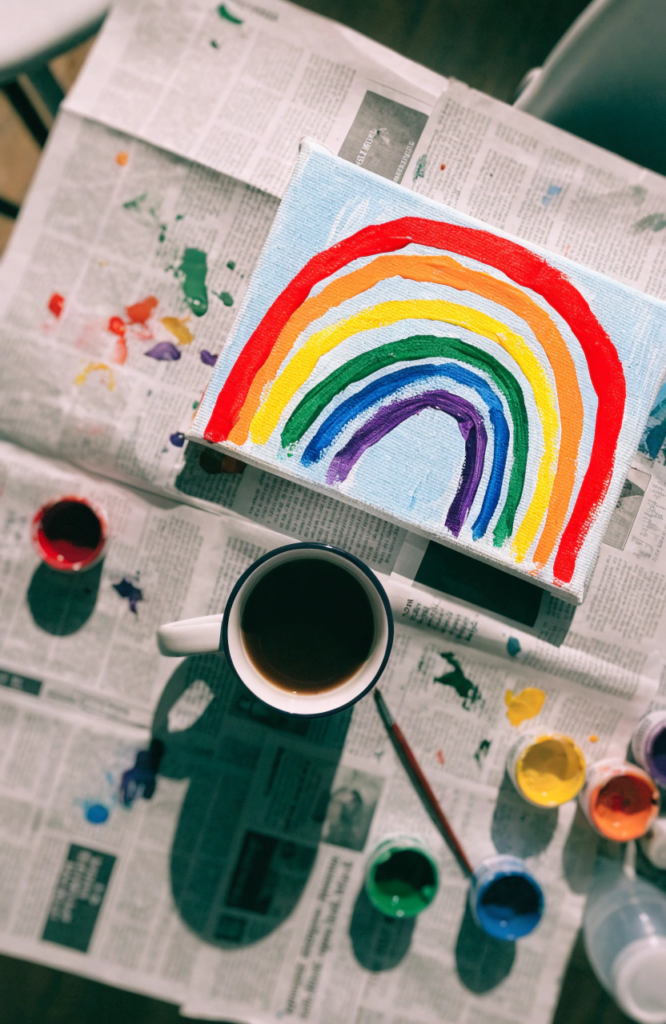
Big, bold arcs of color are satisfying for a kid to paint since the brushstrokes can be as wobbly as they want and it still reads as a rainbow.
Materials: washable paint (red, orange, yellow, green, blue, purple), small canvas, medium paintbrush
Steps:
- Paint a light sky-blue background and let it dry.
- Starting with red, paint a wide curved arc across the upper portion of the canvas.
- Add each following rainbow color just below the last, letting the arcs nest inside each other.
- Don’t worry about perfectly even gaps between the colors, since a little overlap just makes it look more hand-painted.
- Let dry completely.
4. Footprint Butterfly
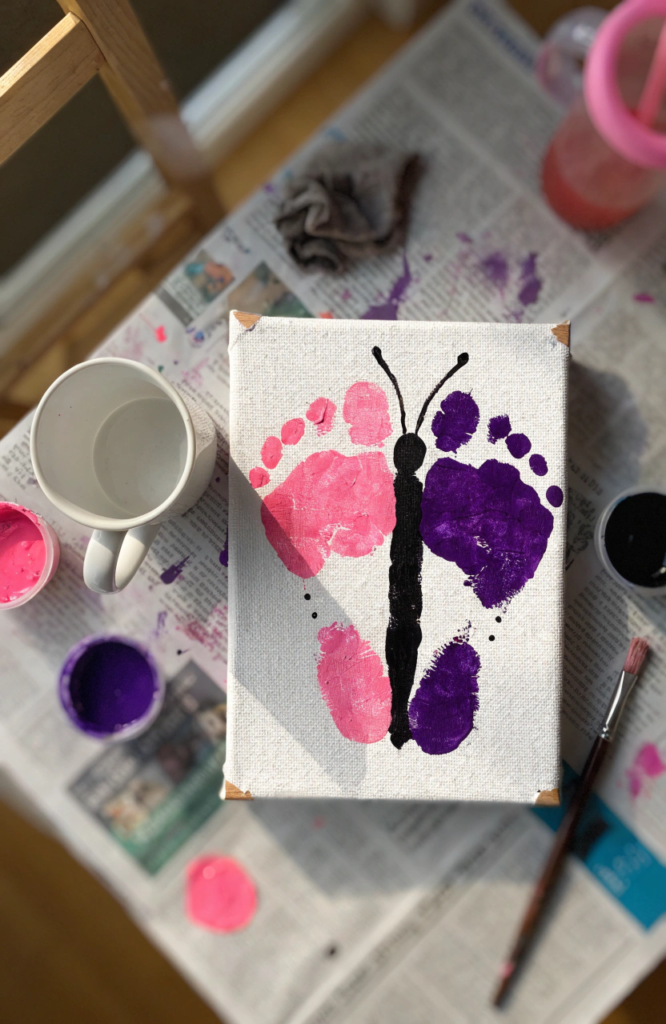
Two footprints angled toward each other form the wings, which makes this one feel like a fun little keepsake as much as it is a craft project.
Materials: washable paint (any two colors), small canvas, damp cloth for cleanup
Steps:
- Paint the sole of a kid’s foot in your chosen color.
- Press one foot down at an angle on one side of the canvas for the first wing.
- Repaint the foot and press it down at a mirrored angle on the other side for the second wing.
- Once dry, paint a simple black body and two thin antennae down the center where the footprints meet.
- Add a few small dots onto the wings for extra detail if you’d like.
5. Paint-Dot Galaxy
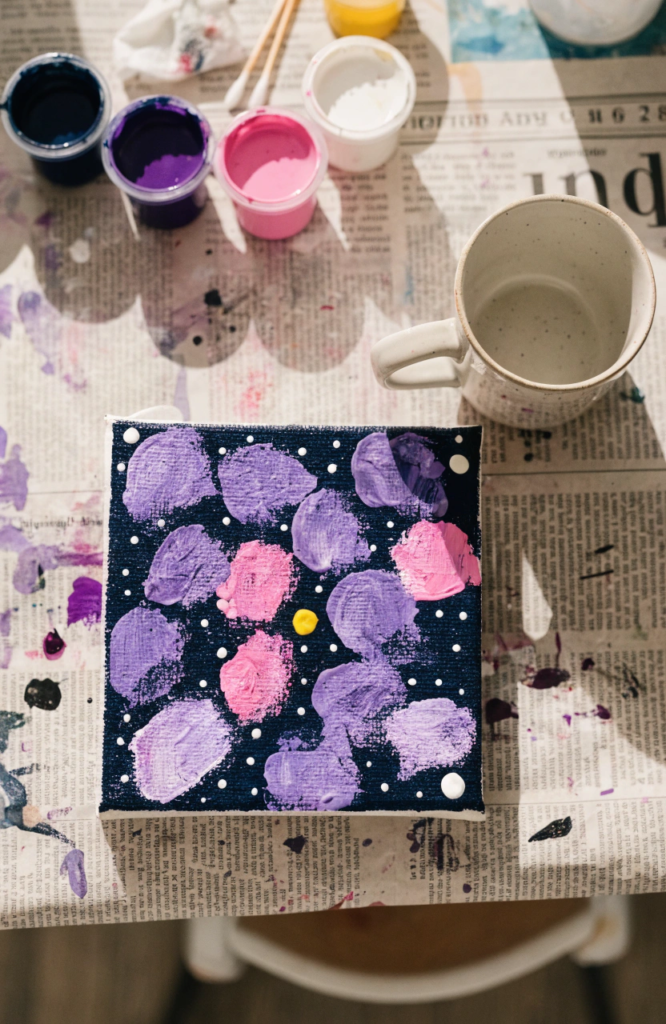
Dabbing colors onto a dark background is one of the most relaxing techniques for a kid to try, since there’s no wrong way to do it.
Materials: washable paint (navy or black base, plus purple, pink, and white), small canvas, cotton swabs or fingertip
Steps:
- Paint the entire canvas navy or black and let it dry fully.
- Dab purple and pink paint in loose, overlapping patches using a cotton swab or fingertip, leaving some dark background showing through.
- Once that layer is mostly dry, dot small white dots scattered across the canvas for stars.
- Add a few larger white dots or a small yellow dot for a bigger star or moon.
- Let the whole thing dry flat.
6. Smiling Sun
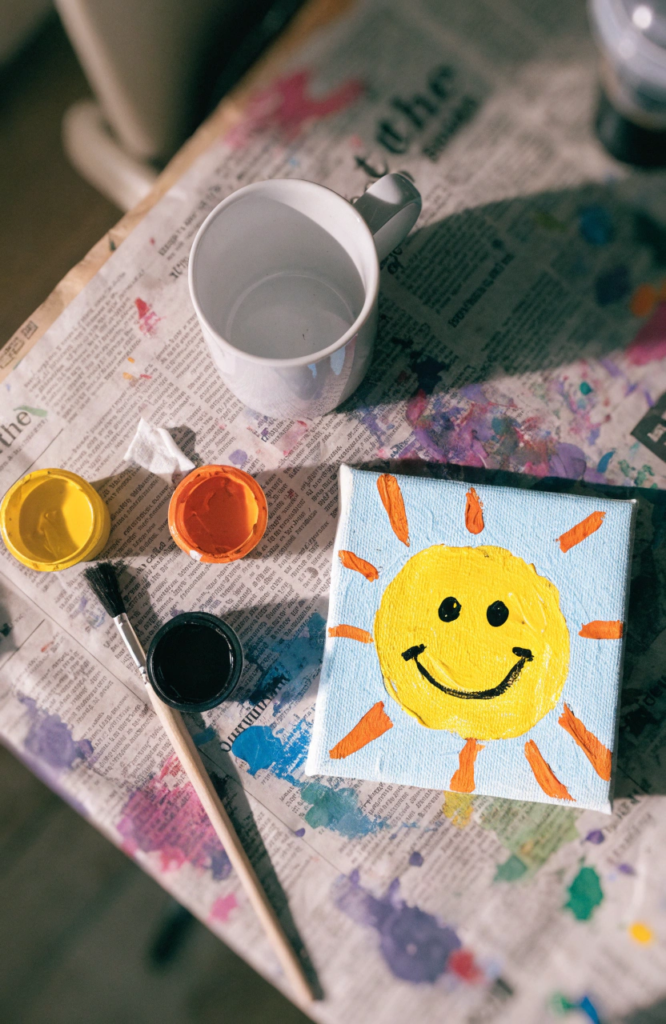
A big yellow circle, some triangle rays, and a simple face make this one an easy win for even the youngest painters in the house.
Materials: washable paint (yellow, orange, black), small canvas, paintbrush
Steps:
- Paint a light blue background and let it dry.
- Paint a large yellow circle in the center of the canvas.
- Add short orange triangle or line rays radiating outward around the circle.
- Once the yellow is dry, paint a simple black smiling face inside the circle.
- Let dry completely.
7. Polka Dot Kitty
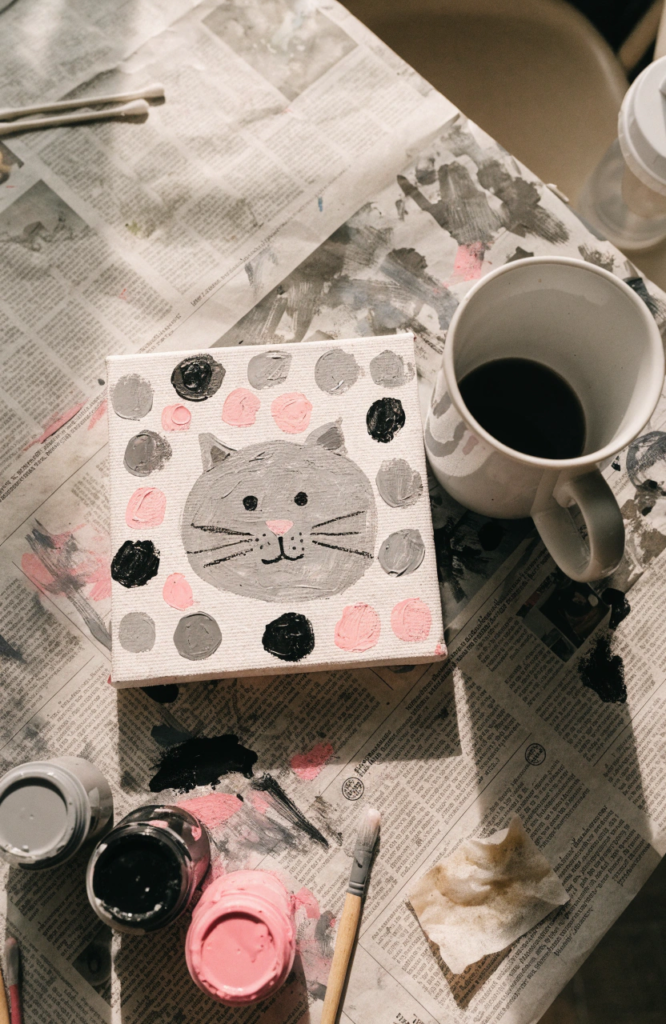
A round head, two triangle ears, and a scatter of dots is really all it takes, and kids tend to really enjoy adding a personality to the face at the end.
Materials: washable paint (any color for the cat, black, pink), small canvas, paintbrush, cotton swab
Steps:
- Paint a large circle for the head and two small triangles on top for ears.
- Let it dry, then paint two black dot eyes, a small pink nose, and a simple mouth.
- Add a few whisker lines out from the nose area.
- Using a cotton swab, dot a scattered pattern of a contrasting color around the background for a playful polka dot effect.
- Let dry completely.
8. Splatter Fireworks
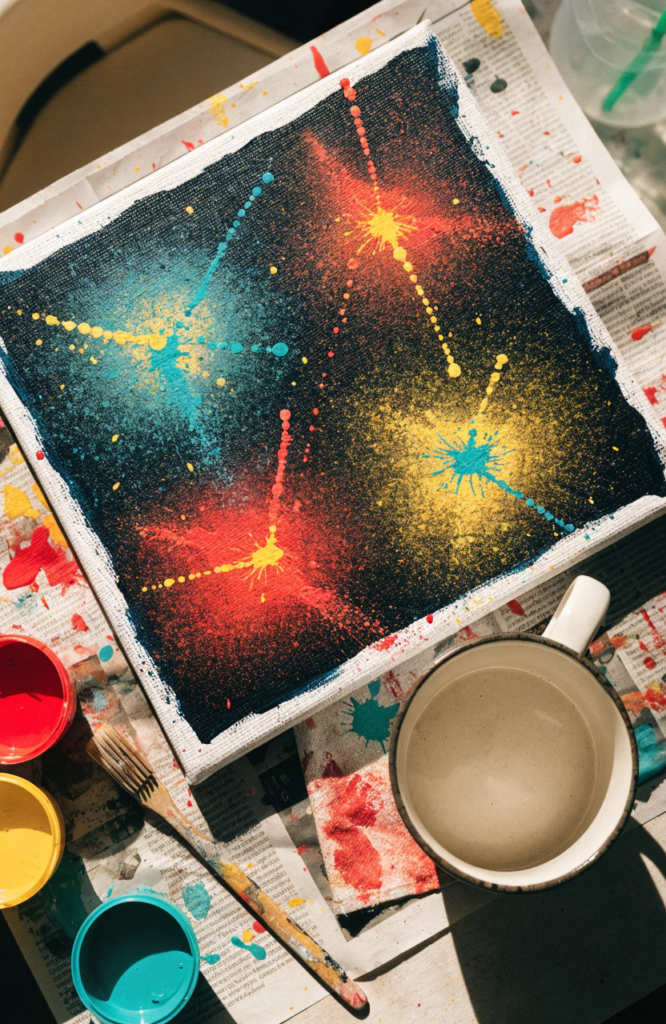
Genuinely one of the most fun techniques on this list, since it involves flicking paint on purpose, which is normally the thing kids get in trouble for.
Materials: washable paint (a few bright colors), dark blue or black canvas base, old toothbrush or stiff brush
Steps:
- Paint the canvas a dark navy or black background and let it dry fully.
- Dip an old toothbrush or stiff brush into one bright color.
- Holding the brush a few inches from the canvas, flick or splatter the paint outward from a central point to mimic a firework burst.
- Repeat with a couple more colors, starting each new splatter from a different point on the canvas.
- Let dry flat, away from anything you don’t want speckled with stray paint.
9. Fingerprint Ladybugs on a Leaf
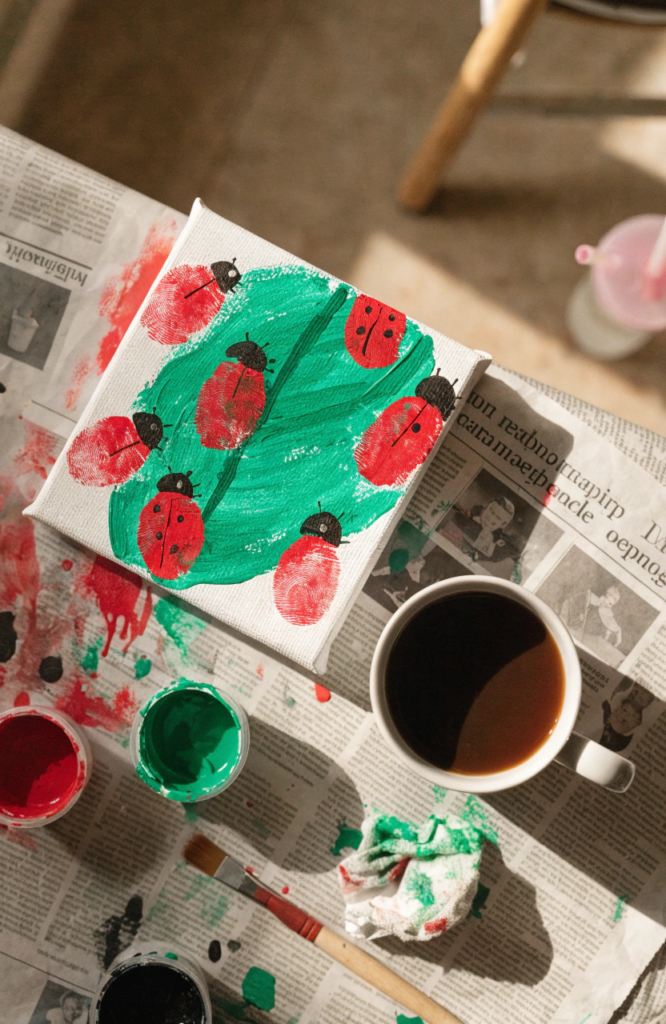
A simple green leaf shape becomes the background for a handful of fingerprint ladybugs, which makes a nice project if you want a little narrative scene rather than just one big image.
Materials: washable paint (green, red, black), small canvas, paintbrush, fingertip
Steps:
- Paint a large green leaf shape across most of the canvas and let it dry.
- Once dry, add a thin darker green line down the center of the leaf for the vein.
- Dip a fingertip into red paint and press a few fingerprint dots onto the leaf for the ladybug bodies.
- Once those are dry, add a small black head and a few tiny black dots onto each red fingerprint.
- Let the whole canvas dry flat.
10. Ocean Wave and Fish
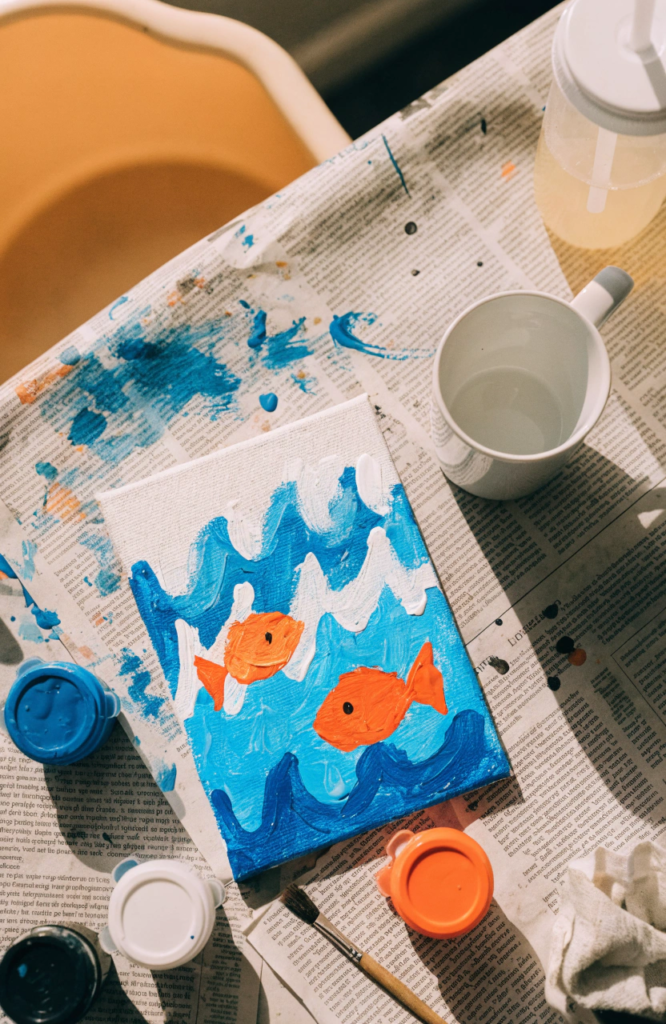
Loose, wavy brushstrokes for the water and a couple of simple fish shapes make this one a fun beach-themed option.
Materials: washable paint (blue, white, orange or yellow, black), small canvas, paintbrush
Steps:
- Paint the lower two-thirds of the canvas in loose wavy strokes of blue, leaving some lighter and darker patches for texture.
- Add a few curved white lines across the waves for foam.
- Once dry, paint one or two simple oval fish shapes swimming through the water.
- Add a triangle tail and fin to each fish, along with a small black dot eye.
- Let dry completely.
11. Simple House and Yard
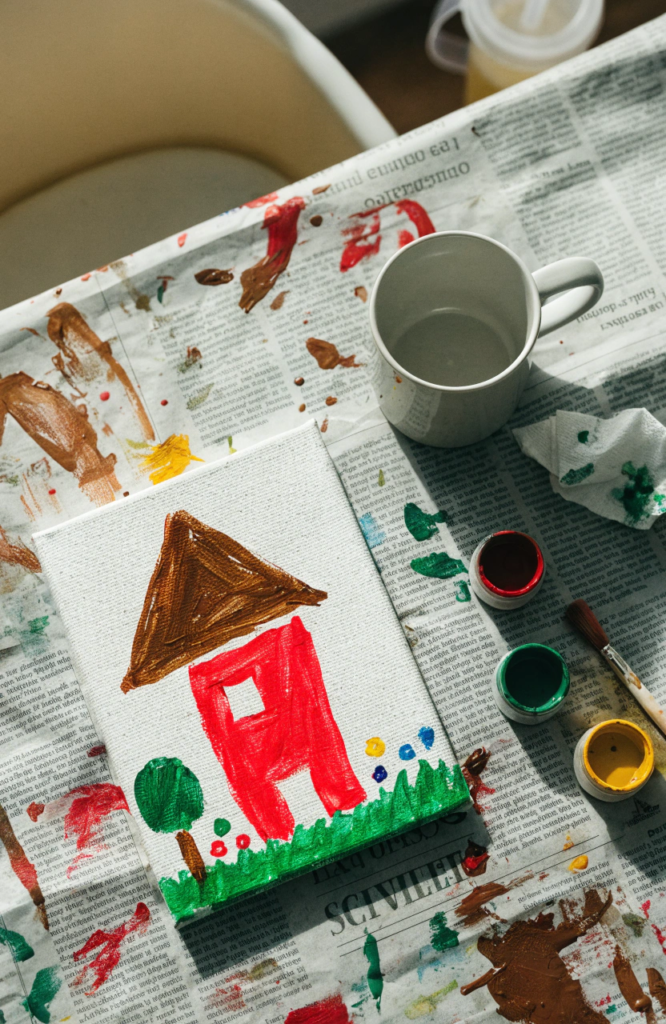
A classic kid drawing subject translated onto canvas, with bold, simple shapes that are easy to plan out and paint.
Materials: washable paint (a few colors of your choice), small canvas, paintbrush
Steps:
- Paint a square or rectangle for the house body and a triangle on top for the roof.
- Add a small square window and a rectangle door once the base shapes are dry.
- Paint a strip of green grass along the bottom of the canvas.
- Add a simple round tree or a few flower dots beside the house for extra detail.
- Let dry completely.
12. Heart Handprint Wreath
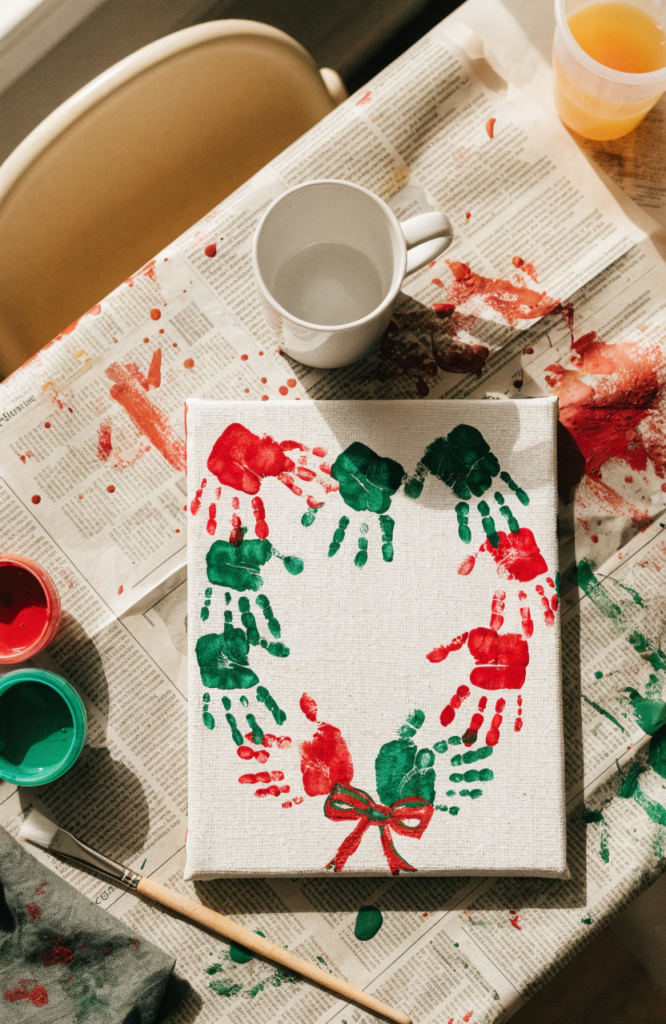
Several handprints arranged in a circle create a wreath shape, which makes this a sweet one for a holiday gift or a keepsake for a grandparent.
Materials: washable paint (red, green, or a mix of colors), small canvas, damp cloth for cleanup
Steps:
- Paint a kid’s hand and press several handprints in a rough circle around the edges of the canvas, leaving the center open.
- Repaint the hand between each print as needed, mixing colors if you’d like a multicolor wreath.
- Let all the prints dry completely.
- Add a small bow shape at the bottom of the wreath using a contrasting color.
- Let dry fully before handling.
13. Thumbprint Bee Garden
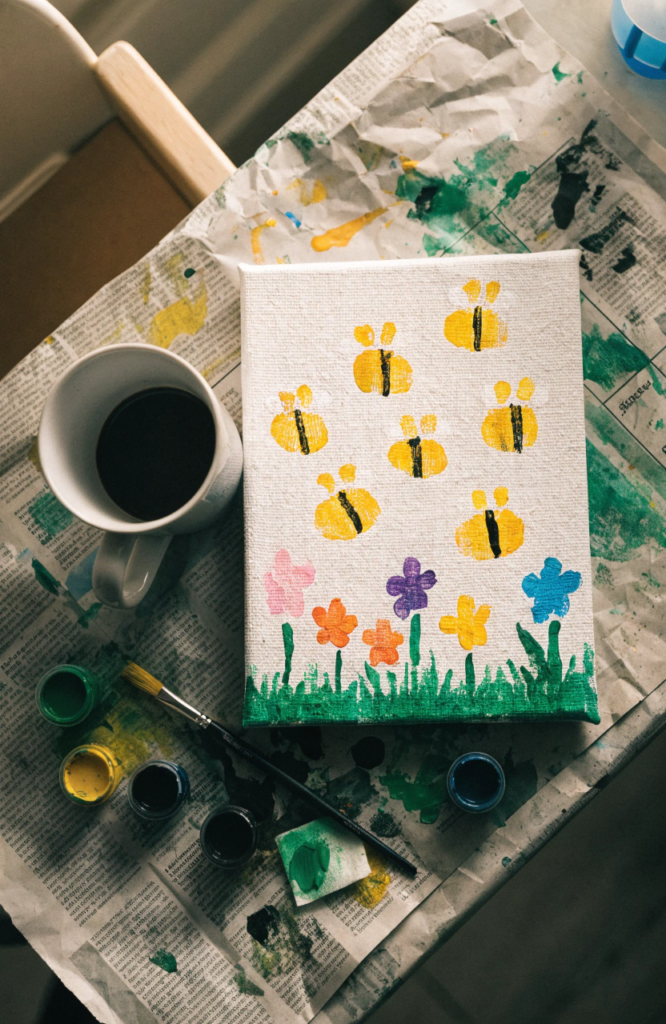
Thumbprints become little bees hovering over a row of simple painted flowers, giving this one a bit of a scene rather than a single subject.
Materials: washable paint (green, a few flower colors, yellow, black), small canvas, paintbrush, fingertip
Steps:
- Paint a strip of green grass along the bottom of the canvas and let it dry.
- Add a few simple flower shapes standing up from the grass in your chosen colors.
- Once dry, press a yellow thumbprint above one of the flowers for a bee’s body.
- Add thin black stripe lines across the yellow print and two small dot wings once it’s dry.
- Repeat with a couple more bees scattered around the flowers.
14. Rainbow Fish Scales
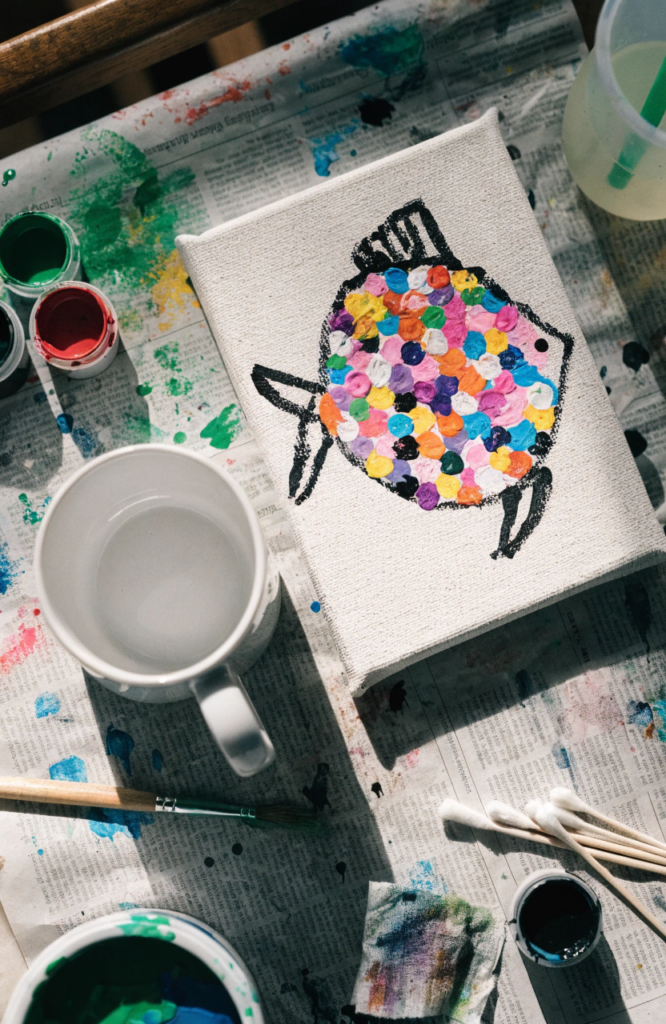
A big fish outline filled in with colorful dabbed scales is a great project for a kid who enjoys filling in detail once the main shape is set up for them.
Materials: washable paint (several bright colors, plus black for the outline), small canvas, paintbrush, cotton swab
Steps:
- Paint a simple large fish outline in black, including the tail and fin shapes.
- Let the outline dry completely.
- Using a cotton swab or fingertip, dab small dots of different bright colors across the body of the fish to fill it in like scales.
- Add a small black dot eye near the head.
- Let dry completely.
15. Paint-Dot Flower Garden
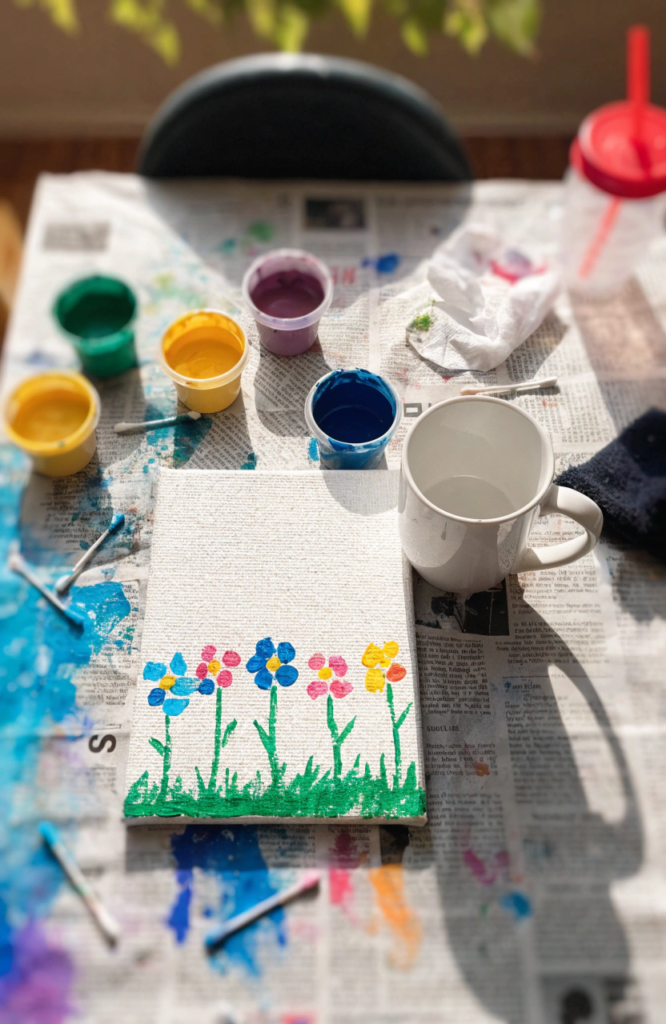
A whole row of simple dot flowers along the bottom of the canvas, which is a nice project if a kid wants to make something colorful without any brush control needed at all.
Materials: washable paint (a mix of bright colors, green, yellow), small canvas, cotton swabs or the end of a paintbrush
Steps:
- Paint a strip of green grass along the bottom of the canvas and let it dry.
- Add a few thin green stems standing up from the grass.
- Using a cotton swab or the round end of a paintbrush, dot five or six petals in a circle around the top of each stem.
- Add a small yellow dot in the center of each flower.
- Let the whole canvas dry flat.
16. Simple Cat Face
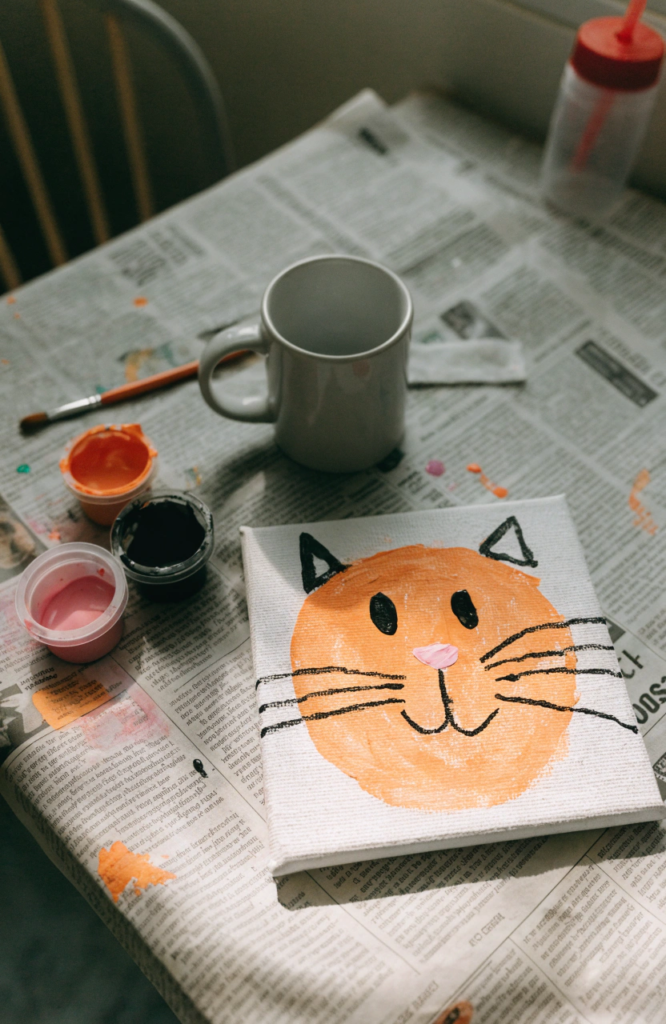
A close-up cat face fills the whole canvas, which makes for a bold, easy composition that doesn’t require planning out a background.
Materials: washable paint (any color for the cat, pink, black), small canvas, paintbrush
Steps:
- Paint a large circle filling most of the canvas for the cat’s head.
- Add two triangle ears at the top once the circle is dry.
- Paint two oval eyes, a small pink nose, and a simple mouth in the lower half of the face.
- Add a few whisker lines extending out from the nose area.
- Let dry completely.
17. Nighttime Moon and Stars
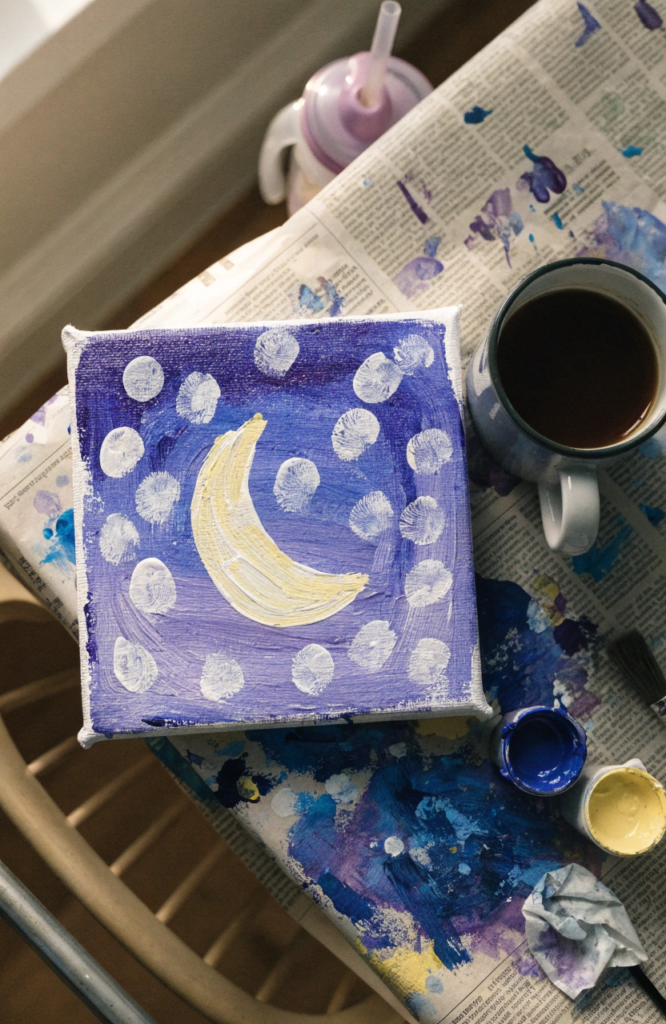
A dark background with a bright moon and a scatter of stars is calming to paint and looks great whether it’s done neatly or a little messy.
Materials: washable paint (dark blue or purple, white or pale yellow), small canvas, paintbrush, fingertip
Steps:
- Paint the entire canvas a deep blue or purple background and let it dry fully.
- Paint a rounded crescent or full moon shape in white or pale yellow.
- Dip a fingertip into white paint and dot stars scattered across the rest of the canvas.
- Add a few slightly bigger star dots here and there for variety.
- Let dry completely before displaying.
Displaying the Finished Canvases
A row of these lined up on a shelf or a simple gallery wall in a kid’s room turns even a quick afternoon project into something that sticks around a lot longer than the paint takes to dry.
Writing the date and the child’s age on the back before it goes up is a small thing, but it makes these genuinely nice to look back on years later. And if a canvas comes out looking nothing like the plan, that’s fine too, since most of the charm in kids’ art comes from it looking exactly like what a kid actually made.