A blank wall is basically begging for something with a little texture and movement, and a cluster of oversized leaves does exactly that without committing you to a big framed piece or a gallery wall you have to keep curating. This version uses simple felt or fabric leaves in a range of sizes and earthy tones, layered together into one organic, cascading shape. No sewing machine required, and no artistic talent either, just a handful of leaf-shaped pieces and a little patience with the layout.
What You’ll Need
- Felt or thick fabric in a few earthy tones, sage, terracotta, cream, mustard
- Leaf template or a few real leaves to trace around
- Scissors
- Fabric glue or a hot glue gun
- Thin wire or floral stem wire for the leaf veins and stems
- Command strips or small nails for hanging
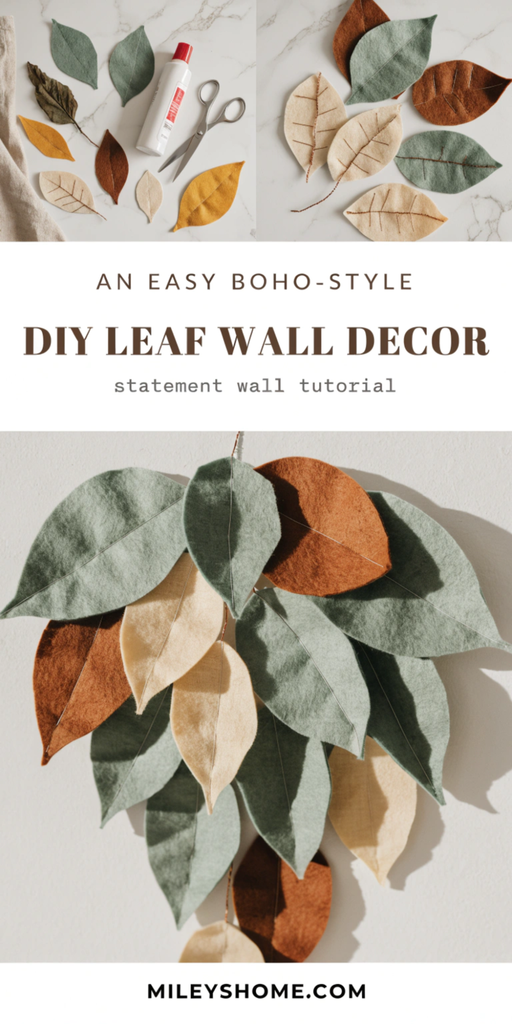
Step 1: Cut Your Leaf Shapes
Trace a few different leaf shapes and sizes onto your fabric, then cut them out. Mix it up, some long and pointed, some rounder, some small, some dramatically oversized. Variety here is what makes the finished piece look intentional instead of repetitive.
Step 2: Add a Vein Line
Lay a short length of wire down the center of each leaf and glue it in place, letting a little extra length stick out the bottom as a stem. This gives each leaf just enough structure to hold a slight curve instead of lying totally flat.
Step 3: Shape Each Leaf
Once the glue sets, gently bend each leaf along its wire vein, a soft curl here, a slight twist there. Real leaves are never perfectly flat, so this one step alone does a lot of the work in making these look natural.
Step 4: Plan the Layout
Before gluing or pinning anything to the wall, lay the whole arrangement out on the floor first. Most versions work best as a loose, cascading shape, wider and fuller at the top, tapering down to just a few leaves trailing at the bottom. Step back and look at it from a distance before committing.
Step 5: Mount the Leaves
Starting from the top of your layout, attach each leaf to the wall using its wire stem tucked behind a small piece of tape or a tiny nail. Work down through your layout, overlapping leaves slightly as you go so the wall underneath barely peeks through.
Step 6: Adjust and Fill Gaps
Stand back and look at the whole piece. Any bare patches? Tuck in a couple of smaller leaves to fill them. Any leaf sitting at an awkward angle? Reshape it right there on the wall, no need to take the whole thing down.
A Few Tips That Make a Big Difference
- Don’t skip the wire. Flat, flimsy leaves read as cardboard cutouts. A little structure changes everything.
- Layer your tones. Two or three shades in the same color family look far richer than one flat color repeated.
- Odd numbers of leaf sizes in each cluster tend to look more natural than even, tidy groupings.
A Few Fun Twists to Try
- Ombre leaf wall — shift from deep green at the top to pale cream at the bottom for a gradient effect.
- Paper version — swap felt for cardstock and skip the wire, gluing straight to the wall for a flatter, more graphic look.
- Dried real leaves — press and seal actual leaves with a light coat of clear sealant for a totally natural version.
- Single statement branch — mount the leaves along one curved branch instead of directly on the wall for a piece you can move around.
Keeping It Looking Good
Dust the leaves occasionally with a soft brush or a hairdryer on a cool, low setting, since felt tends to collect dust faster than you’d expect. If a leaf ever droops or loses its shape, just reshape the wire again, the whole point of using it was so you could keep adjusting long after the glue’s dried. Done well, this kind of wall piece isn’t seasonal at all, it just quietly works year round.