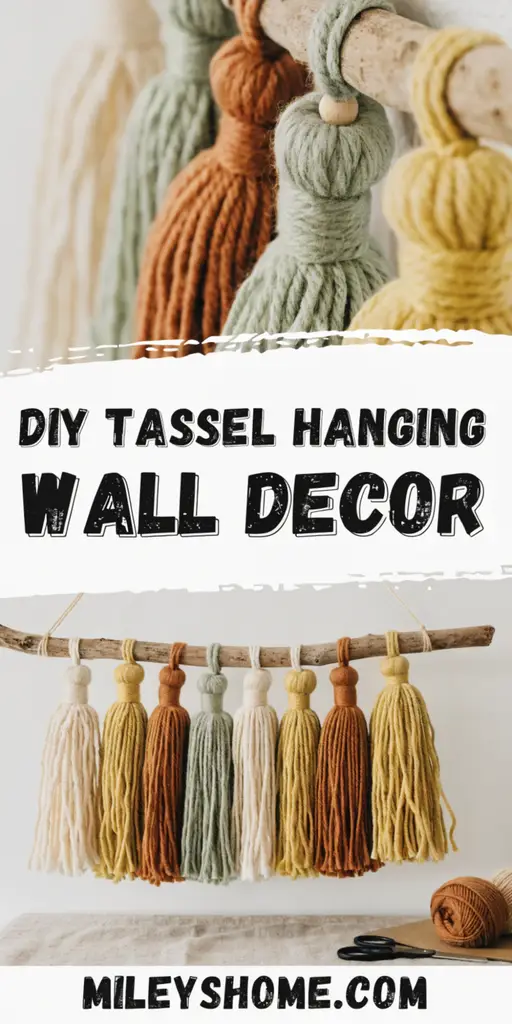
Macrame wall hangings look incredible, but let’s be honest, learning a dozen new knots just to fill some blank wall space is a big ask. A tassel wall hanging gets you basically the same cozy, textured look with one skill: wrapping yarn around your hand. That’s it. String a row of fat, fluffy tassels across a dowel and you’ve got a piece that looks like it took a weekend, when really it took about one episode of whatever you’re currently watching.
What You’ll Need
- A wooden dowel, driftwood branch, or thin curtain rod
- Yarn in two or three coordinating colors, a chunkier weight works best
- Scissors
- A piece of cardboard, about 6 to 8 inches tall
- Twine or matching thread for tying off each tassel
- String or ribbon for hanging the dowel
Step 1: Wrap Your Yarn
Wrap yarn around the cardboard piece, lengthwise, somewhere between 30 and 50 times depending on how full you want each tassel. More wraps, chunkier tassel. Simple as that.
Step 2: Tie Off the Top
Slide a short piece of twine under the wrapped yarn at the top edge of the cardboard and tie it tightly. This becomes the loop that holds the tassel onto the dowel, so pull it snug.
Step 3: Cut the Bottom Loop
Slide your scissors along the bottom edge of the cardboard and snip straight through all the wrapped loops. You’ll end up with one bundle of yarn, tied at the top, loose at the bottom.
Step 4: Wrap the Neck
About an inch down from the top tie, wrap a separate strand of yarn tightly around the bundle several times to cinch in the “neck” of the tassel. Tuck the ends into the wrap to hide them, or tie a small knot and trim it close.
Step 5: Trim It Even
Lay the tassel flat and trim the bottom fringe so all the strands line up evenly. Don’t rush this part, a clean trim is honestly what separates a store-bought looking tassel from a scraggly one.
Step 6: Make a Full Set
Repeat the process to make as many tassels as you want strung across your dowel, mixing colors and sizes as you go. A row of eight to twelve tassels in varying lengths tends to look fuller than a uniform, evenly sized row.
Step 7: Attach to the Dowel
Using the top loop on each tassel, tie or loop it directly onto the dowel. Space them out, overlap a few if you want a denser look, and let the lengths stagger naturally rather than lining every tassel up at the same height.
Step 8: Add a Hanger
Tie a length of string or ribbon to both ends of the dowel, leaving enough slack to loop over a nail or hook. Step back and check that the dowel hangs level before calling it finished.
A Few Tips That Make a Big Difference
- Vary the lengths. Trim a few tassels shorter than the rest so the bottom edge has some rhythm instead of one straight line.
- Mix yarn textures. A chunky wool tassel next to a smooth cotton one adds depth that color alone can’t.
- Steam it out. A quick pass with a handheld steamer relaxes any kinks left over from the wrapping process.
A Few Fun Twists to Try
- Ombre tassels — grade the colors from dark to light across the row for a gradient effect.
- Beaded accents — thread a wooden or ceramic bead onto the loop before tying each tassel to the dowel.
- Double row — hang a second, shorter dowel just behind the first for a layered, fuller silhouette.
- Mini garland version — string a bunch of smaller tassels along a single length of twine instead of a dowel for a lighter, more delicate piece.
Keeping It Looking Good
Give the tassels a gentle shake or a quick once-over with a fabric brush every so often to keep dust from settling into the fibers. If the fringe starts looking a little wild after a while, a fresh trim brings it right back to that clean, finished look. And since the whole thing is just yarn and a dowel, it’s an easy piece to redo in a new color palette whenever you’re ready for a change without starting completely from scratch.