Bandanas are one of those projects that quietly cover a lot of ground once you start looking around. There’s the dog version that’s basically taken over crochet social media, the baby bib version that solves a genuinely annoying drool problem, and the grown-up headscarf version that’s honestly just a fun accessory.
All of them boil down to a simple triangle with some kind of closure, which makes this a great category if you want a lot of finished projects without a lot of complicated technique. Here are 14 to work through.
A Few Notes Before You Start
For anything going around a pet’s neck, skip a tight-tied closure and use a snap, a sewn-in elastic panel, or a simple slip-over style instead, since a tied bandana can be a strangulation risk if it catches on something and a dog or cat panics.
Never leave a pet unsupervised in a bandana, even a safe one, the same way you wouldn’t leave a collar on unattended in certain situations. For baby bibs, always use a snap or hook-and-loop closure rather than a tie, for the same reasoning covered in a lot of baby safety guidance around anything near a young child’s neck.
A worsted weight yarn with a 4mm or 5mm hook works for most of these, though the adult headscarf versions can handle a slightly thicker or more textured yarn if you want extra drape.
1. Classic Dog Bandana
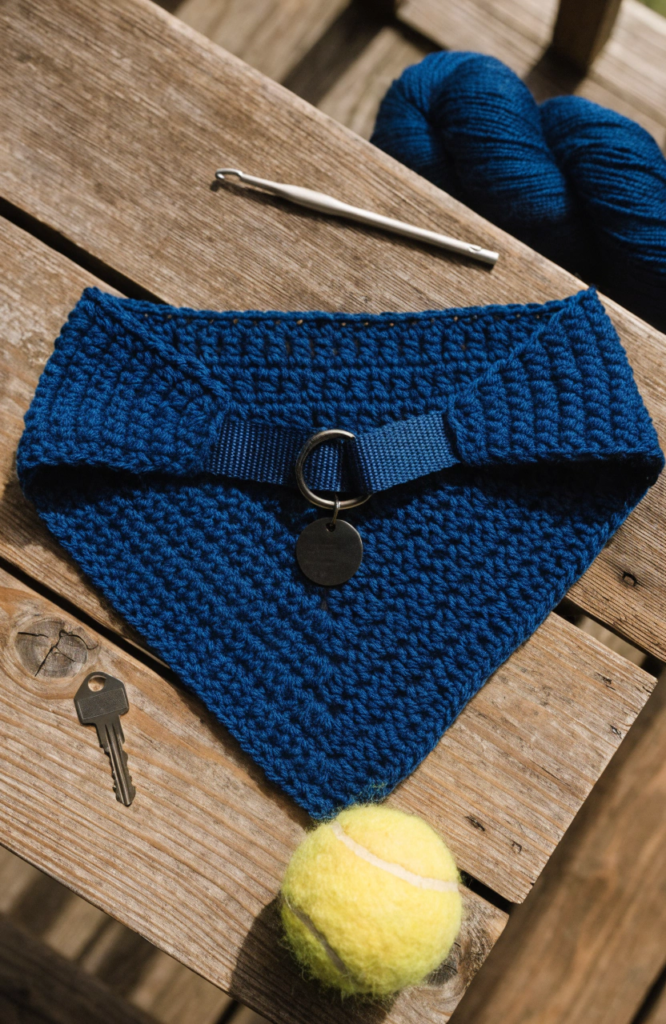
The over-the-collar style, where the bandana slides directly onto an existing collar rather than tying around the neck on its own, is honestly the safest and easiest version to make.
Materials: worsted weight yarn, 4mm hook, tapestry needle
Steps:
- Chain a length matching roughly half the width of the finished bandana’s top edge.
- Work your first row, increasing one stitch at each end to begin building the triangle shape.
- Continue increasing at both ends of every row, working straight rows of single or double crochet until the triangle reaches your desired size.
- Fold the top edge in half and stitch a channel along the fold, leaving both ends open so a collar can slide through.
- Weave in all ends, then slide the finished bandana onto the dog’s regular collar before buckling it on.
2. Tie-On Puppy Bandana
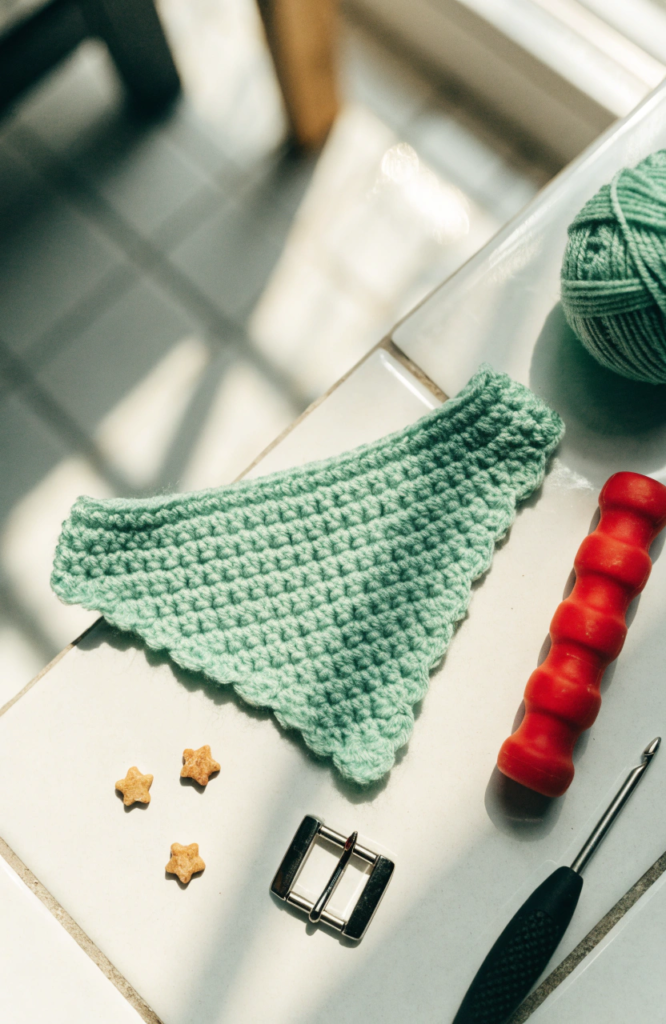
A smaller-scale version for puppies who aren’t wearing a collar yet, using a soft, stretchy tie instead of a knot that could tighten unexpectedly.
Materials: soft worsted or sport weight yarn, 3.5mm hook, a short length of soft elastic cord, tapestry needle
Steps:
- Chain a short length and work increasing rows the same way as the classic bandana, but scaled down for a small puppy’s size.
- Continue until the triangle reaches your desired size, keeping in mind puppies grow fast, so slightly generous sizing helps it last a bit longer.
- Work a small channel along the top edge the same way as the collar-slide version.
- Thread the soft elastic cord through the channel instead of a fixed tie, so there’s some natural give if it catches on something.
- Always supervise the puppy while wearing it, and remove it during unsupervised play or crate time.
3. Baby Bandana Bib
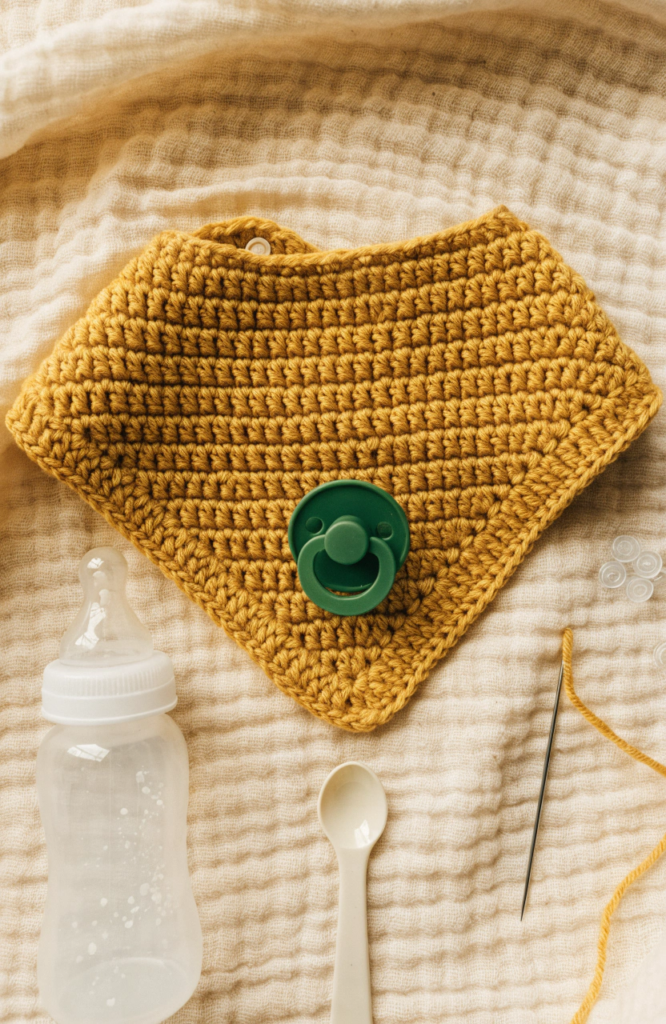
This one solves an actual problem instead of just looking cute, since it catches drool while still looking like a proper accessory instead of a plain terry cloth bib.
Materials: soft worsted weight yarn, 4mm hook, a snap or hook-and-loop closure, tapestry needle
Steps:
- Chain a length for the top edge and work increasing rows to build a triangle shape sized to sit comfortably on a baby’s chest.
- Continue until the triangle reaches your desired size, then work a finishing round around the two angled edges.
- Add a curved neckline shape at the top rather than leaving it straight, so it sits comfortably under the chin.
- Attach a snap or hook-and-loop closure at the back of the neckline instead of a tie.
- Weave in all ends securely, since this piece will be washed frequently.
4. Boho Fringe Headscarf
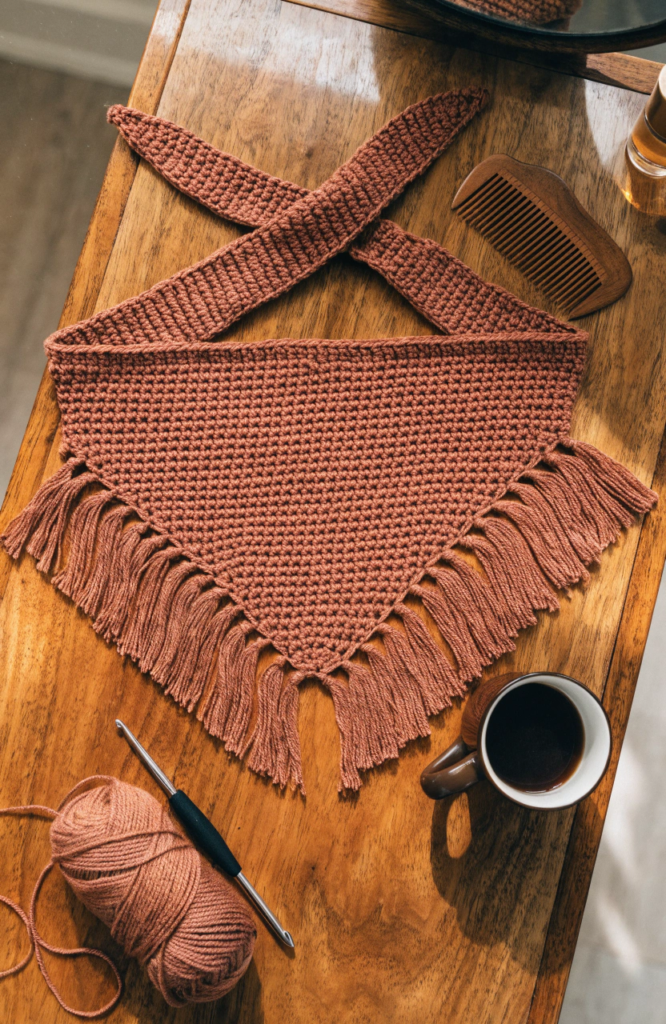
A grown-up accessory this time, styled after the fabric bandana headscarves that tie at the nape of the neck or under the chin.
Materials: worsted weight yarn, 5mm hook, tapestry needle
Steps:
- Chain a length for the top edge and work increasing rows to build a wide triangle, larger than the pet and baby versions since this needs to wrap around an adult head.
- Continue increasing until the triangle reaches a size that comfortably covers from the forehead back over the crown.
- Work two long, narrow tie extensions off each side of the top corners, long enough to tie comfortably at the back of the head or under the chin.
- Add fringe along the bottom point and lower edges by cutting short lengths of yarn and knotting them through the stitches.
- Weave in all ends and trim the fringe evenly.
5. Striped Kids Bandana
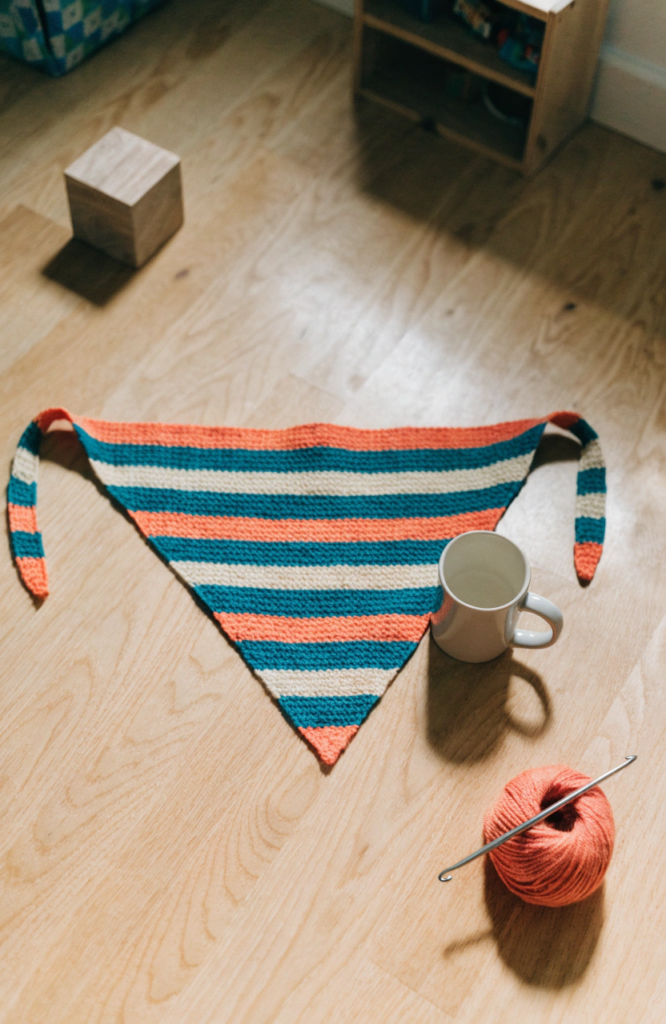
A playful accessory piece for a kid, whether they’re wearing it as a headband, a neck scarf over a jacket, or just tying it around a wrist like a bracelet.
Materials: worsted weight yarn in several colors, 4mm hook, tapestry needle
Steps:
- Chain a length for the top edge and work increasing rows to build a triangle scaled to a child’s proportions.
- Change colors every couple of rows as you work, building up a striped pattern as the triangle grows.
- Continue until the piece reaches your desired size.
- Add two shorter tie extensions from the top corners, kept a comfortable length for a kid to tie themselves.
- Weave in all the color-change ends carefully, since there will be more of them than a single-color version.
6. Scalloped Edge Dog Bandana
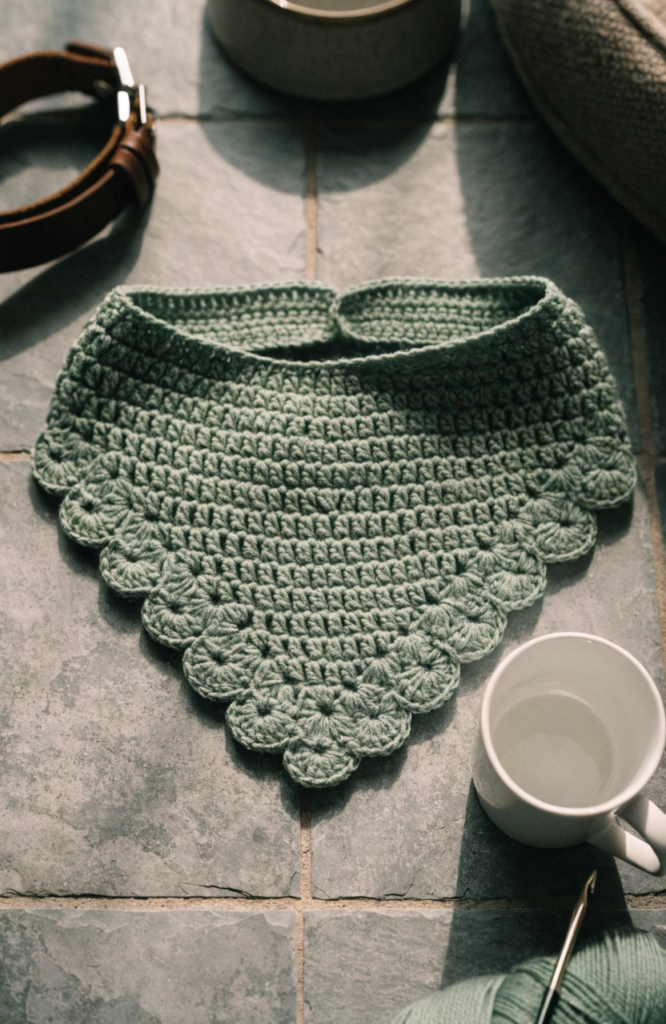
A dressier version of the classic collar-slide bandana, with a shell stitch border along the bottom edges for a bit of extra detail.
Materials: worsted weight yarn, 4mm hook, tapestry needle
Steps:
- Work the basic triangle shape the same way as the classic dog bandana, increasing at both ends of every row.
- Once the triangle reaches your desired size, work a round of shell stitches along the two angled bottom edges instead of a plain border.
- Leave the top edge plain, since that’s where the collar channel goes.
- Fold and stitch the top edge into a channel the same way as the classic version.
- Weave in all ends and slide it onto the dog’s collar.
7. Western Fringe Bandana
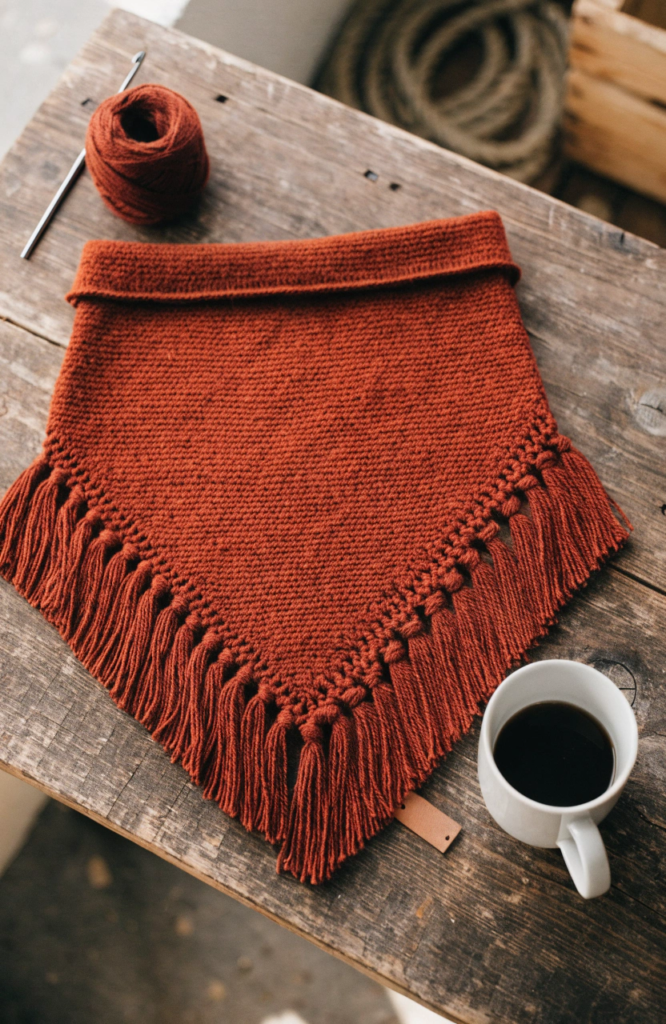
Leaning into a slightly rugged, western look with fringe along the bottom point and a simple solid color body.
Materials: worsted weight yarn in a rust, tan, or deep red tone, 4mm hook, tapestry needle
Steps:
- Work the basic triangle shape, increasing at both ends of every row until it reaches your desired size.
- Add a simple border round along the two angled edges for a clean finish.
- Cut lengths of yarn and knot them through the stitches along the bottom point and lower edges for fringe.
- Trim the fringe to an even length once it’s all attached.
- Finish with a collar channel or tie closure depending on whether this one’s for a pet or a person.
8. Cat Bandana Collar
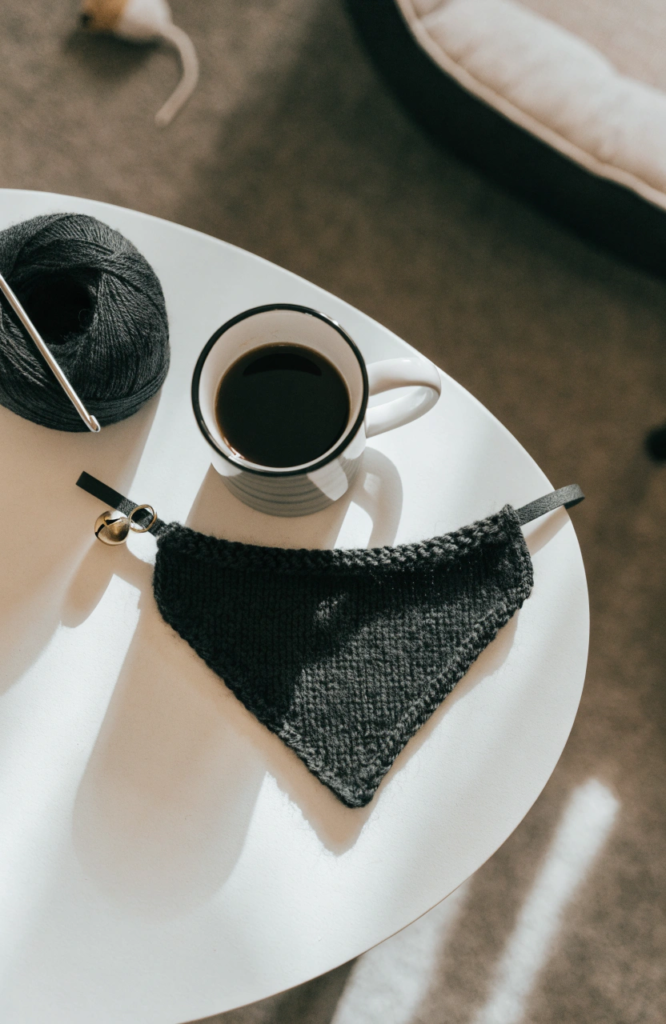
Scaled down and lightweight, since cats tend to be far less tolerant of anything bulky or tight around their neck than dogs usually are.
Materials: soft sport or fingering weight yarn, 3mm hook, tapestry needle
Steps:
- Chain a short length and work increasing rows to build a small, lightweight triangle sized for a cat.
- Keep the piece thin and unstuffed, avoiding any bulky borders or added layers that might bother a cat.
- Work a narrow channel along the top edge, sized to slide onto a breakaway cat collar.
- Weave in all ends, keeping any loose tails trimmed very short so nothing dangles.
- Slide it onto the cat’s existing breakaway collar and always supervise wear.
9. Bandana Bunting Garland
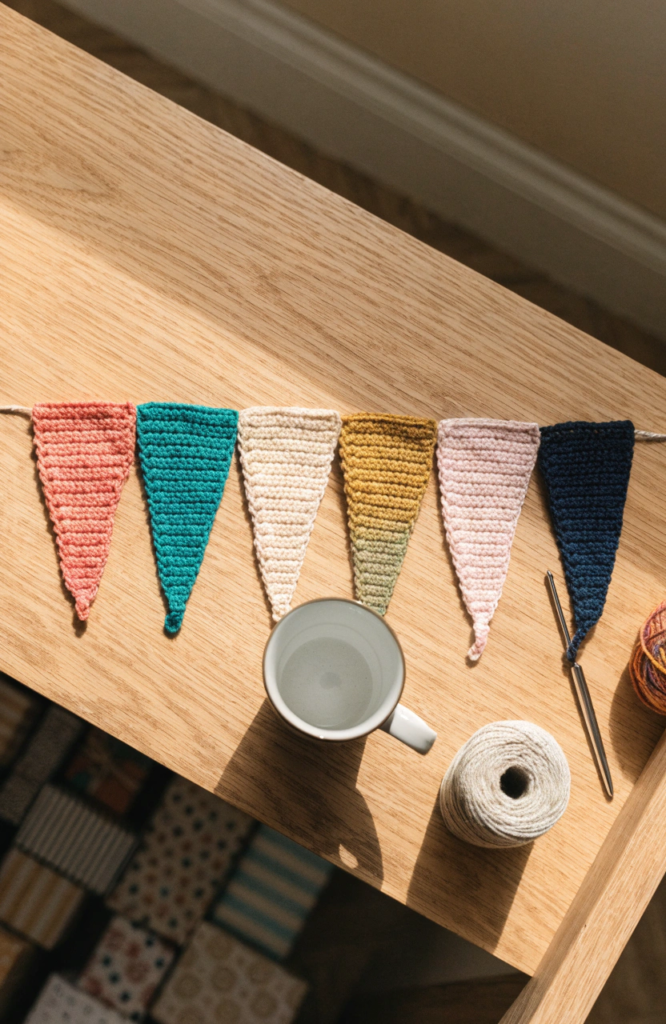
Not wearable at all, this one strings a row of small bandana-shaped triangles together into a simple garland for a party or a nursery wall.
Materials: worsted weight yarn in several colors, 4mm hook, ribbon or cord for stringing, tapestry needle
Steps:
- Work a small triangle shape using the same increasing row technique as the wearable versions, but scaled down and without a channel or tie.
- Repeat to make six to eight small triangles in a mix of colors.
- Weave in the ends on each triangle securely.
- Lay the ribbon or cord out and space the triangles evenly along its length.
- Sew or tie each triangle onto the cord at the top point to string them all together.
10. Chunky Winter Neck Bandana
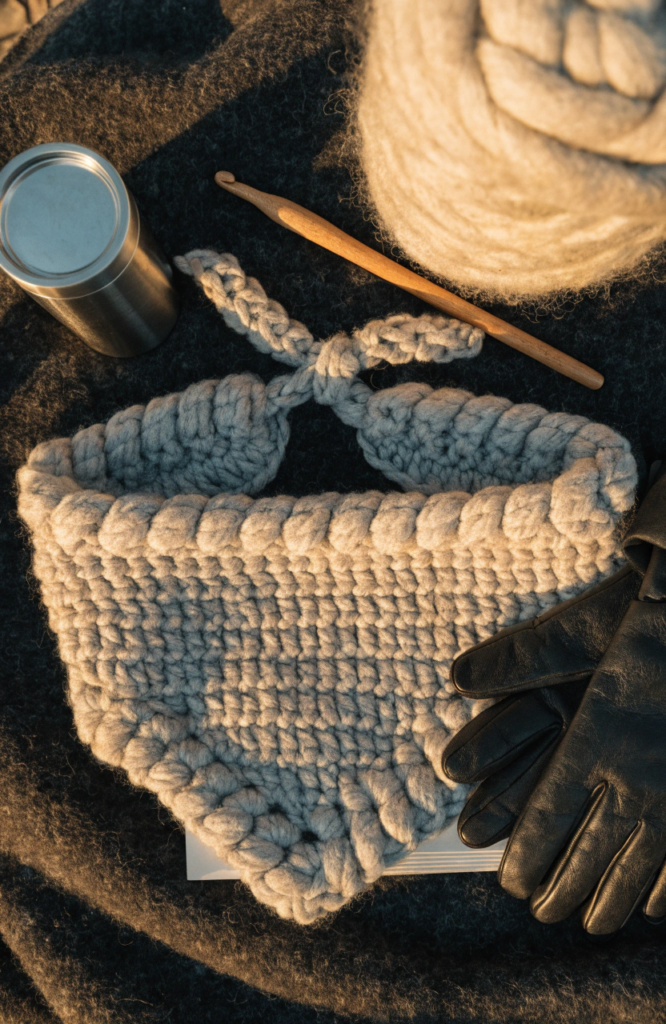
A cozier, thicker version of the adult headscarf meant to be worn folded and tied at the neck like a small scarf rather than over the hair.
Materials: bulky weight yarn, 6mm hook, tapestry needle
Steps:
- Chain a length for the top edge and work increasing rows in a bulky yarn, which will build up size faster than the worsted weight versions.
- Continue until the triangle reaches a good size for folding and wrapping around an adult neck.
- Work two short tie extensions off the top corners, just long enough to knot comfortably without excess dangling length.
- Add a simple ribbed or textured border for extra coziness.
- Weave in all ends securely, since bulky yarn ends can be trickier to hide than thinner yarn.
11. Floral Applique Baby Bib
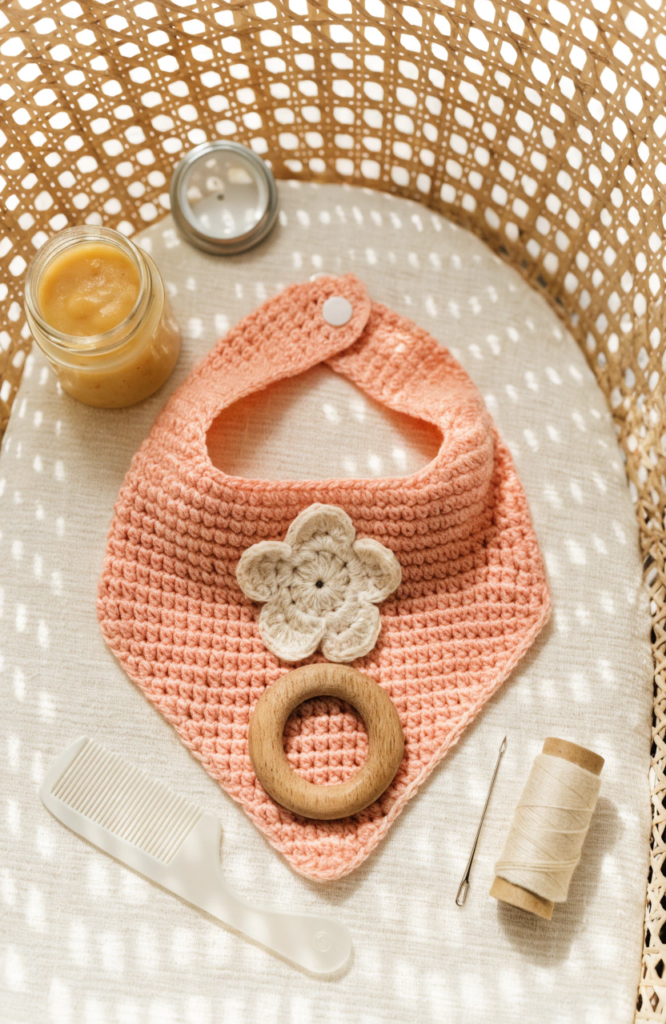
The same bandana bib base as before, but with a small crocheted flower motif sewn onto the front for extra charm.
Materials: soft worsted weight yarn in a main color plus a contrast for the flower, 4mm hook, a snap or hook and loop closure, tapestry needle
Steps:
- Work the bandana bib triangle the same way as the standard version, in your main color.
- Separately, work a small five-petal flower motif in a contrasting color.
- Sew the flower securely onto the front center of the bib, checking that it’s flat and firmly attached with no loose edges.
- Attach a snap or hook-and-loop closure at the back of the neckline.
- Weave in all ends, double-checking the flower’s stitches especially well since babies tend to grab and tug at anything textured.
12. Reversible Two-Tone Dog Bandana
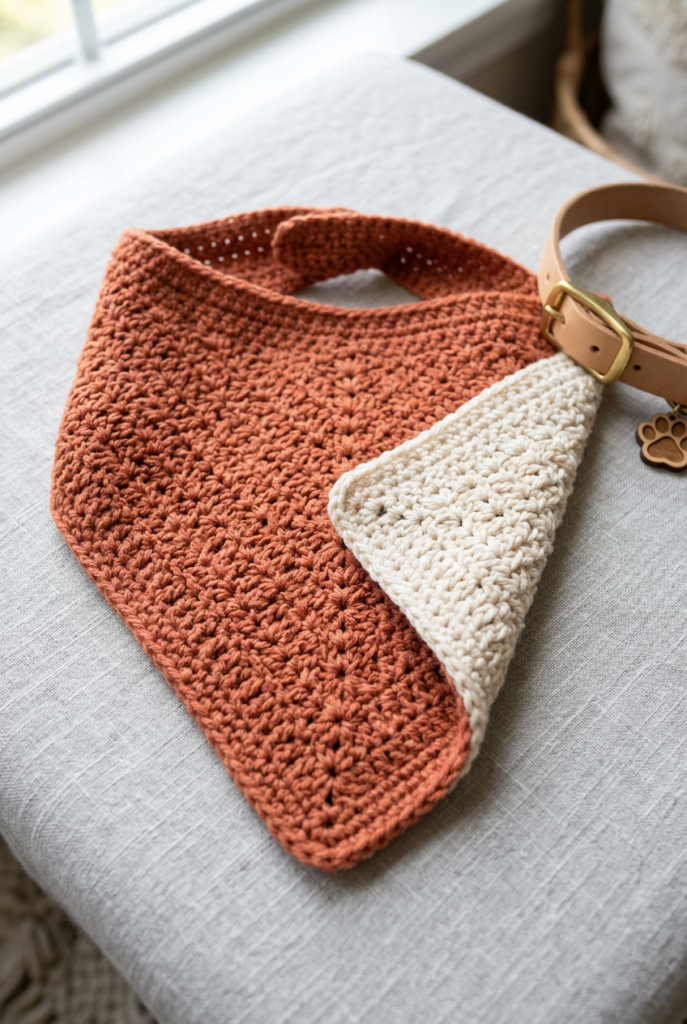
Two coordinating triangles worked separately and joined back to back, so the bandana can flip depending on the mood or outfit that day.
Materials: worsted weight yarn in two coordinating colors, 4mm hook, tapestry needle
Steps:
- Work one triangle in your first color using the standard increasing row technique.
- Work a second, matching triangle in your second color.
- Hold the two triangles with wrong sides together and single crochet around the two angled edges to join them, leaving the top edge open.
- Fold and stitch the joined top edge into a channel for the collar to slide through.
- Weave in all ends and slide onto the dog’s collar, flipping to whichever color faces out.
13. Pineapple Stitch Boho Bandana
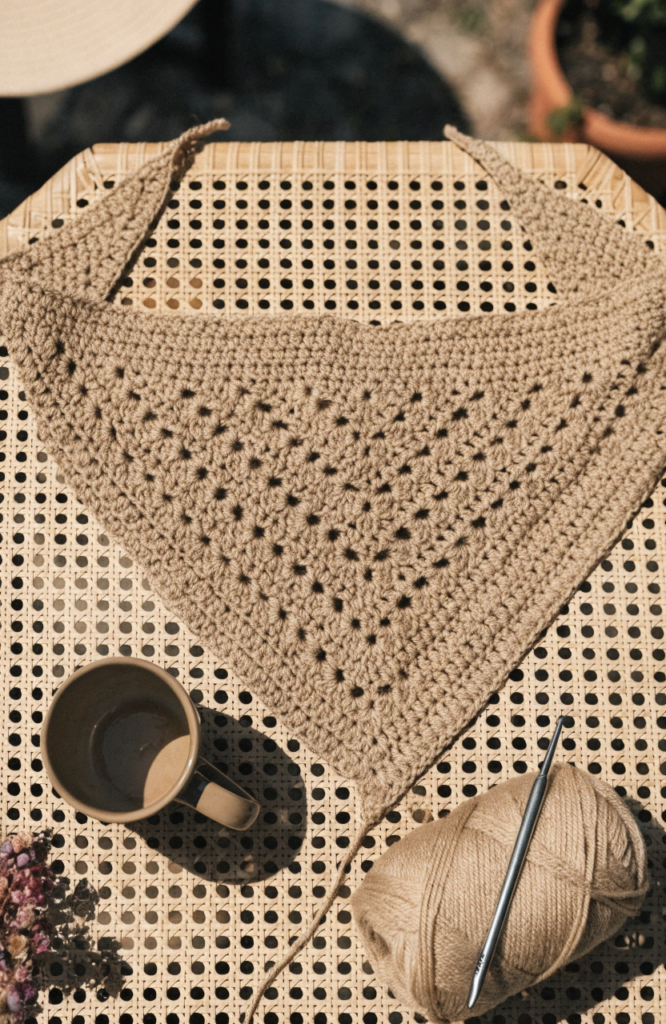
A more textured take on the adult headscarf, using pineapple or v-stitch clusters to build a lacy, open pattern instead of a solid fabric.
Materials: worsted weight yarn, 5mm hook, tapestry needle
Steps:
- Chain a length for the top edge and work your first row in a v-stitch or pineapple cluster pattern, increasing at both ends to begin the triangle shape.
- Continue working the textured stitch pattern row by row, increasing at both ends of every row until the triangle reaches your desired size.
- Work a simple border round along the two angled edges to keep the open stitch pattern from stretching out of shape.
- Add two tie extensions from the top corners.
- Weave in all ends and give the piece a gentle steam block to help the stitch pattern lay open and even.
14. Denim-Look Kids Bandana
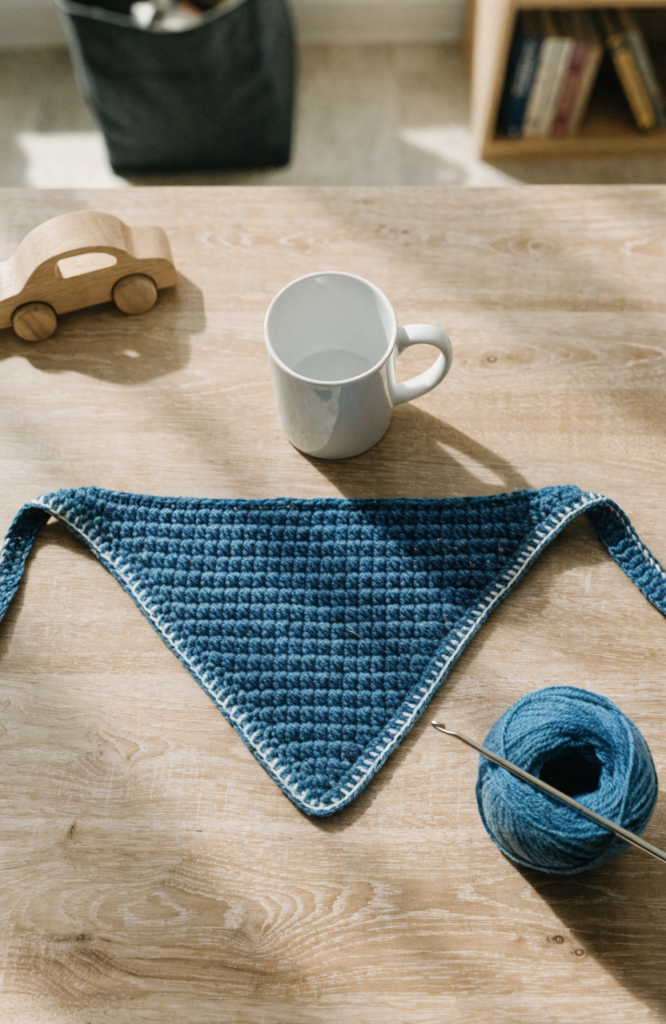
Using a heathered blue yarn and a simple single crochet base, this one mimics a denim bandana look that pairs well with a kid’s everyday outfit rather than reading as costume-y.
Materials: heathered blue worsted weight yarn, 4mm hook, tapestry needle
Steps:
- Work the basic triangle shape in single crochet, which gives a denser, more fabric-like texture than a taller stitch would.
- Continue increasing at both ends of every row until the triangle reaches a size scaled for a kid.
- Add a simple topstitch-style detail by working a contrasting line of surface slip stitches along the border in a lighter thread, mimicking denim stitching.
- Add two tie extensions from the top corners, sized for a kid to tie on their own.
- Weave in all ends and trim any surface stitching tails neatly.
A Few Final Notes on Wearing These Safely
Whether a bandana’s headed for a dog, a cat, a baby, or a kid, it’s worth checking the fit before leaving it on unsupervised, and honestly, unsupervised wear is worth avoiding altogether for the pet and baby versions specifically.
For the adult and kid headscarf styles, a snug but not restrictive tie is really the only thing to watch for. Beyond that, these are quick enough to make in bulk, so it’s easy to build up a small rotating collection in different colors without much time investment at all.