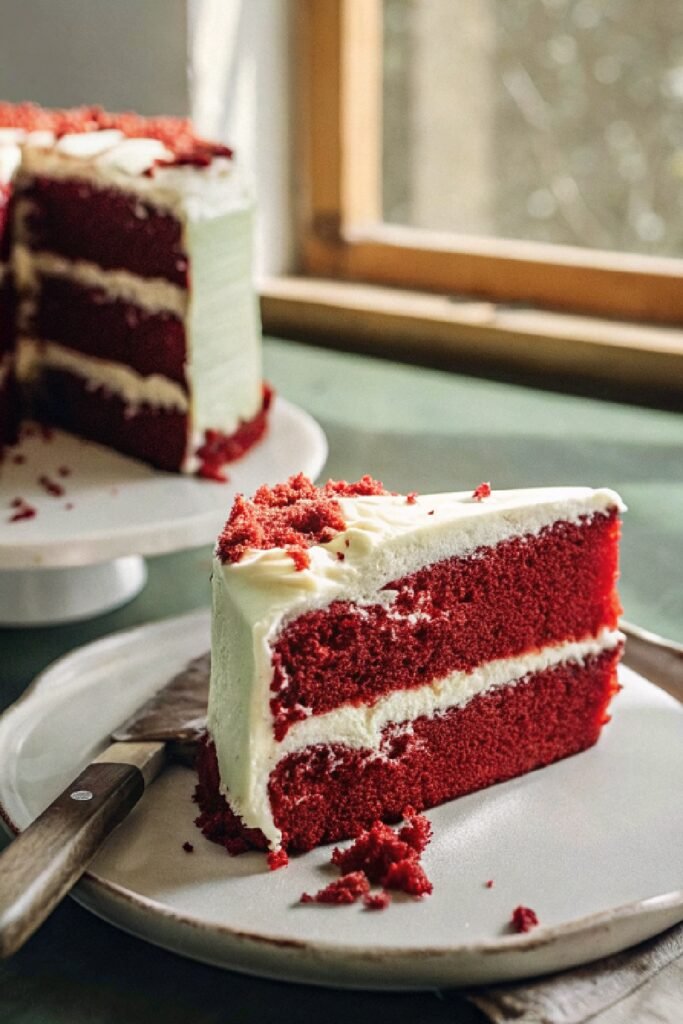
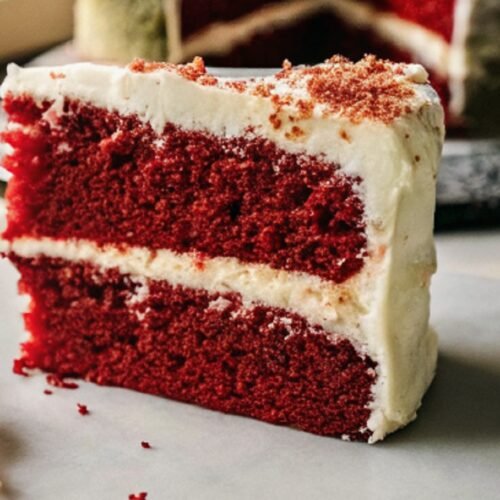
Red Velvet Cake is the perfect indulgent treat. My recipe is carefully designed to have a balanced chocolate flavor and tender crumb.
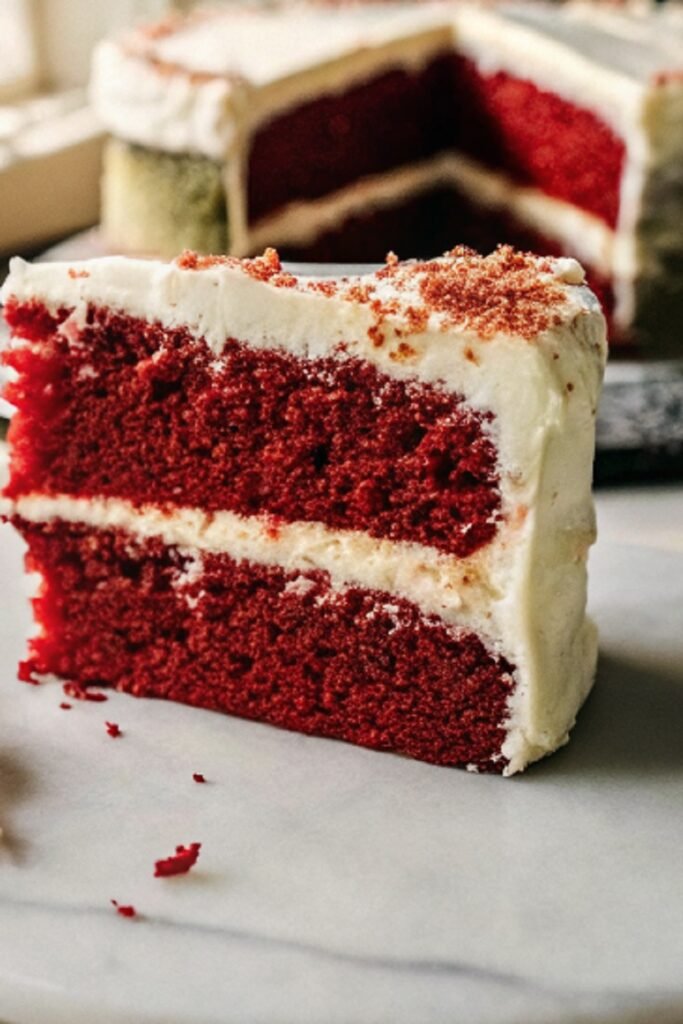
This delicious, not-too-sweet, red velvet cake is a perfectly moist, bordering on fudgy (without being messy), and satisfying classic cake. It has a rich cocoa flavor and just the right amount of tanginess. If you enjoyed my red velvet cookies, you’ll love this new red velvet and cream cheese creation!
This recipe is simple, but it wasn’t so simple to create. I thought that adding cocoa to my classic vanilla cake recipe would work, but it wasn’t that easy. I ended up taking some notes from my devil’s food cake and adding buttermilk to get the perfect (non-dry) texture and rich red velvet flavor. Trust me, it works!
Why You’ll Love This Recipe
Soft and Plush Texture: This Red Velvet Cake hits that sweet spot between classic bakery flavor and easy home baking. The crumb stays soft and plush, thanks to oil and buttermilk working together.
Subtle Cocoa Flavor: A light cocoa note adds depth without making it taste like chocolate cake.
The Best Frosting: What really makes this one special is the cream cheese frosting. It spreads smoothly, tastes tangy and sweet, and pairs perfectly with the cake layers.
Easy to Make: I also love how forgiving the batter feels. It mixes smoothly and bakes up evenly, which helps a lot if you bake for guests or special days.
Ingredients
For the Cake Batter:
- 2 2/3 cups plain cake flour
- 2 tablespoons unsweetened cocoa powder
- 1 teaspoon baking soda
- Pinch of salt
- 1/2 cup unsalted butter, softened
- 1 1/2 cups caster sugar
- 2 eggs, at room temperature
- 1 cup vegetable oil
- 1 cup buttermilk, at room temperature
- 2 teaspoons vanilla extract
- 2 1/2 tablespoons red liquid food coloring
- 1 teaspoon white vinegar
For the Cream Cheese Frosting:
- 14 oz Philadelphia cream cheese, block, softened
- 1/2 cup unsalted butter, softened
- 4 cups soft icing sugar
- 1 1/2 teaspoons vanilla extract

Step by Step Instructions
1. Prepare the Cake Pans
Start by heating your oven to 350°F. Grease two 9 inch round pans and line the bottoms with parchment paper. Lightly dust the sides with flour so the layers release cleanly after baking. I like to tap out the extra flour so the edges stay smooth.
2. Mix the Dry Ingredients
In a medium bowl, whisk the cake flour, cocoa powder, baking soda, and salt. Break up any cocoa lumps so the color stays even later. Set this bowl aside while you work on the batter.
3. Cream Butter and Sugar
In a large bowl, beat the softened butter with caster sugar until light and fluffy. This step adds air and helps the cake rise evenly. Take a moment here and scrape the bowl so everything blends smoothly.
4. Add Eggs and Oil
Beat in the eggs one at a time, mixing well after each. Pour in the vegetable oil and mix until the batter looks glossy and smooth. The oil keeps the cake extra moist, even after chilling.
5. Add Color and Flavor
Stir in the vanilla extract and red food coloring until the color looks deep and even. Add the vinegar and mix briefly. This step helps the baking soda activate and keeps the crumb tender.
6. Combine Wet and Dry
Add the dry ingredients in three parts, alternating with buttermilk. Start and end with dry ingredients. Mix gently until just combined. Stop as soon as the batter looks smooth to avoid a dense cake.
7. Bake the Layers
Divide the batter evenly between the pans. Smooth the tops and bake for 28 to 32 minutes until a toothpick comes out clean. Let the cakes cool in the pans for 10 minutes, then turn out onto a rack to cool fully.
Serving Suggestions
Red Velvet Cake shines best at room temperature. I love slicing it thick and serving it with coffee or tea. For parties, cut smaller slices and garnish each plate with fresh berries for a pop of color.
If you want to dress it up, add a light dusting of cocoa powder or a swirl of extra frosting on top. This cake also pairs nicely with vanilla ice cream if you want a dessert that feels extra indulgent.
Tips and Variations
- For extra soft layers, make sure all ingredients sit at room temperature before mixing. Cold dairy can affect texture.
- You can bake this as a sheet cake and frost it straight in the pan for easy serving.
- If you prefer less sweetness, reduce the icing sugar by half a cup and add a pinch of salt to the frosting.
Frequently Asked Questions
Can I skip the food coloring?
Yes. The cake will taste the same but look more like a light cocoa cake.
Why use vinegar?
Vinegar reacts with baking soda and helps create a soft, tender crumb. You will not taste it.
Can I make this ahead?
You can bake the layers a day early and wrap them tightly. Frost the next day for best texture.
How do I store leftovers?
Keep the cake covered in the fridge for up to four days. Let slices sit out briefly before serving.
Final Thoughts
Red Velvet Cake feels timeless for a reason. The color draws you in, the texture stays soft, and the frosting pulls everything together in the best way. This version keeps things simple while delivering that classic bakery taste at home.
Red Velvet Cake
Ingredients
For the Cake Batter:
- 2 2/3 cups plain cake flour
- 2 tablespoons unsweetened cocoa powder
- 1 teaspoon baking soda
- Pinch of salt
- 1/2 cup unsalted butter softened
- 1 1/2 cups caster sugar
- 2 eggs at room temperature
- 1 cup vegetable oil
- 1 cup buttermilk at room temperature
- 2 teaspoons vanilla extract
- 2 1/2 tablespoons red liquid food coloring
- 1 teaspoon white vinegar
For the Cream Cheese Frosting:
- 14 oz Philadelphia cream cheese block, softened
- 1/2 cup unsalted butter softened
- 4 cups soft icing sugar
- 1 1/2 teaspoons vanilla extract
Instructions
- Prepare the Cake Pans: Start by heating your oven to 350°F. Grease two 9 inch round pans and line the bottoms with parchment paper. Lightly dust the sides with flour so the layers release cleanly after baking. I like to tap out the extra flour so the edges stay smooth.
- Mix the Dry Ingredients: In a medium bowl, whisk the cake flour, cocoa powder, baking soda, and salt. Break up any cocoa lumps so the color stays even later. Set this bowl aside while you work on the batter.
- Cream Butter and Sugar: In a large bowl, beat the softened butter with caster sugar until light and fluffy. This step adds air and helps the cake rise evenly. Take a moment here and scrape the bowl so everything blends smoothly.
- Add Eggs and Oil: Beat in the eggs one at a time, mixing well after each. Pour in the vegetable oil and mix until the batter looks glossy and smooth. The oil keeps the cake extra moist, even after chilling.
- Add Color and Flavor: Stir in the vanilla extract and red food coloring until the color looks deep and even. Add the vinegar and mix briefly. This step helps the baking soda activate and keeps the crumb tender.
- Combine Wet and Dry: Add the dry ingredients in three parts, alternating with buttermilk. Start and end with dry ingredients. Mix gently until just combined. Stop as soon as the batter looks smooth to avoid a dense cake.
- Bake the Layers: Divide the batter evenly between the pans. Smooth the tops and bake for 28 to 32 minutes until a toothpick comes out clean. Let the cakes cool in the pans for 10 minutes, then turn out onto a rack to cool fully.