Plain bucket hats are everywhere right now, which is exactly why painting your own is such a good move. For a few dollars in fabric paint you get something nobody else at the park is wearing, and unlike a lot of crafts, this one actually gets worn and seen instead of sitting on a shelf. Below are 18 designs built specifically for the shape of a bucket hat, working with the brim and crown instead of pretending the hat is a flat canvas.
A Few Notes Before You Start
Fabric paint is worth buying if you can, since it stays flexible once dry and won’t crack the way regular acrylic can on fabric that bends and folds all day. If fabric paint isn’t available, mixing acrylic with a fabric medium gets you most of the way there. Slide a piece of cardboard or a paper plate inside the hat before you paint so nothing bleeds through to the other side.
Sketch your design lightly in chalk or a washable fabric pen first if you’re nervous about symmetry, since chalk brushes away easily if you change your mind halfway through. And once everything’s fully dry, heat-set the paint with an iron on a low setting through a thin cloth, or just follow whatever your fabric paint bottle recommends, so it actually survives a wash.
1. Racing Stripe Duo
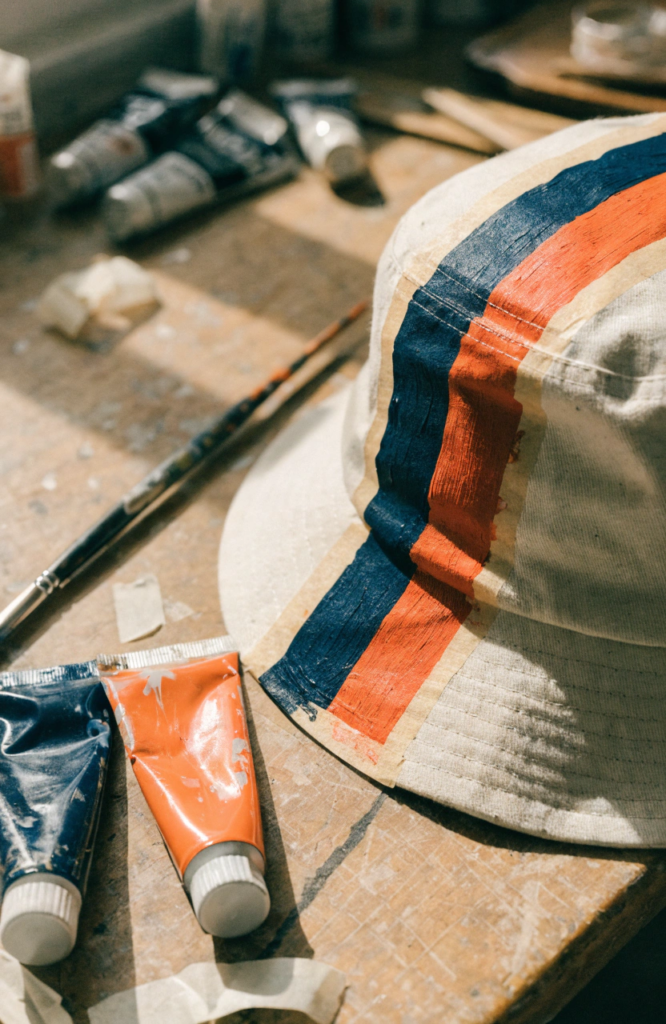
Two clean stripes running from the brim up over the crown give the hat a sporty look, and honestly, this might be the easiest design on the whole list.
Materials: fabric paint (2 contrasting colors), painter’s tape, flat brush, cardboard insert
Steps:
- Insert the cardboard piece and tape off two straight parallel lines running front to back over the crown.
- Paint the first stripe and let it dry to the touch.
- Remove that tape, then tape and paint the second stripe in your contrasting color.
- Touch up any uneven edges with a fine brush once both tapes are off.
- Let dry fully and heat-set.
2. Cherry Pair Patch
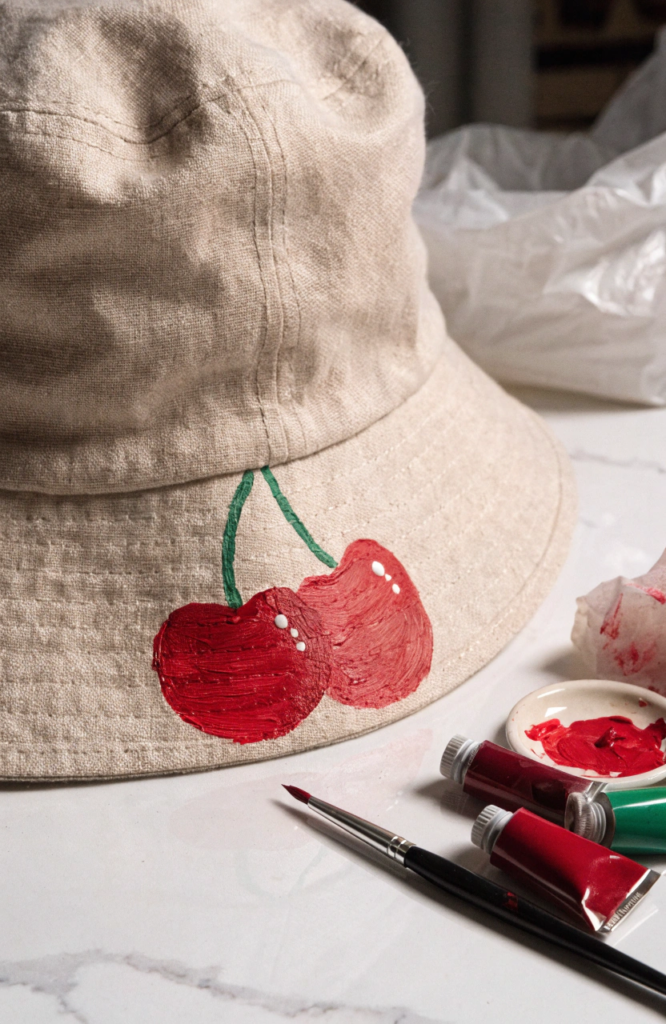
A little cluster of cherries on the brim is one of those designs that looks way more detailed than it actually is to paint.
Materials: fabric paint (red, green, small amount of white), fine brush, cardboard insert
Steps:
- Paint two small overlapping circles in red on the brim for the cherries.
- Add a thin green stem connecting both circles at the top.
- Paint one or two small green leaf shapes near where the stems meet.
- Dot a tiny white highlight on each cherry for shine.
- Let dry and heat-set.
3. Wavy Rainbow Brim
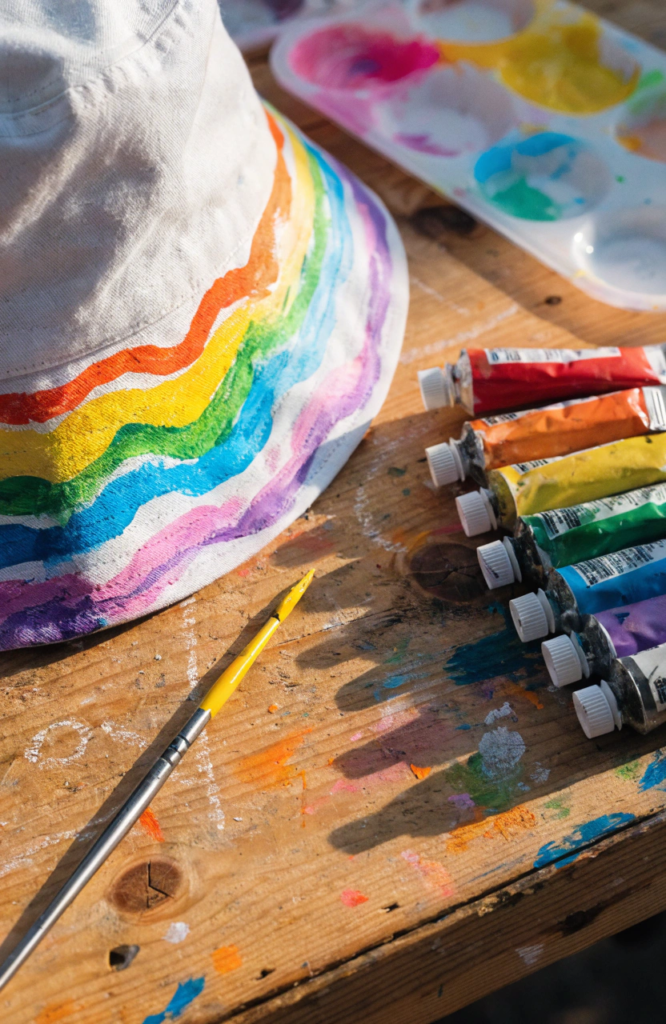
Instead of a full arch, this one runs soft wavy lines of color around just the edge of the brim, so it reads as playful without taking over the whole hat.
Materials: fabric paint (5 to 6 colors), fine brush, cardboard insert
Steps:
- Lightly sketch a wavy line following the curve of the brim’s outer edge.
- Paint your first color along that wave.
- Add each following color just below it, letting the waves stack in a loose rainbow order.
- Keep the lines a little uneven on purpose, since it reads as hand-drawn either way.
- Let dry and heat-set.
4. Leopard Print Dots
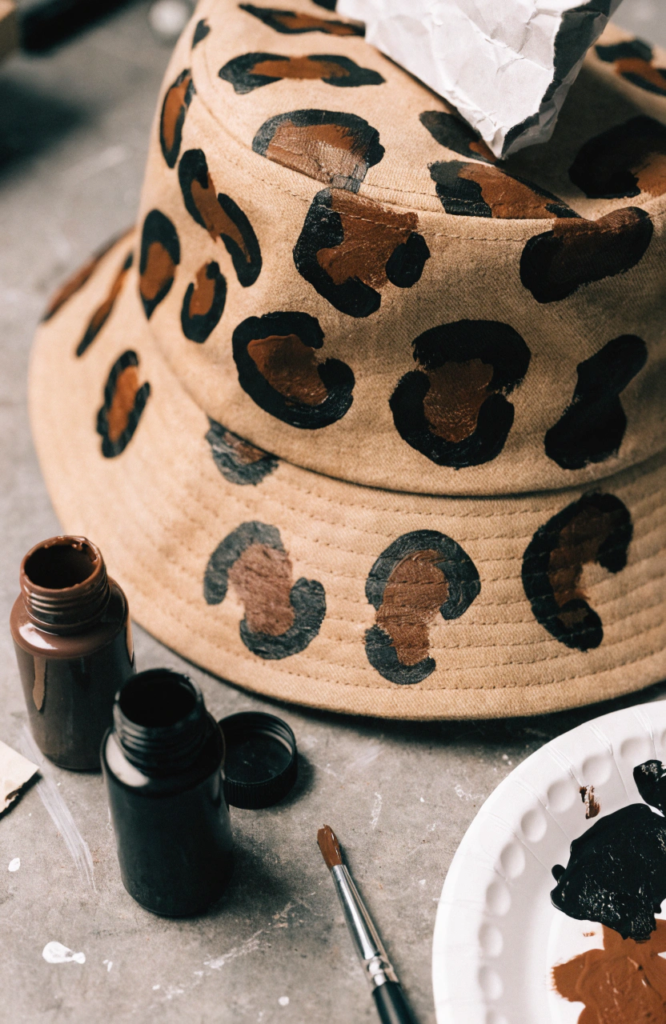
This one’s mostly just irregular blobs, which makes it a lot more forgiving than it looks like it should be.
Materials: fabric paint (tan base, dark brown, black), fine brush, cardboard insert
Steps:
- If your hat isn’t already a light tan or cream, paint a base coat and let it dry.
- Paint a scatter of irregular dark brown blob shapes across the crown, spacing them unevenly.
- Once dry, add a thin black outline around one edge of each brown blob, leaving the other side open.
- Add a few smaller solid black dots between the larger shapes for variation.
- Let dry and heat-set.
5. Lightning Bolt Flash
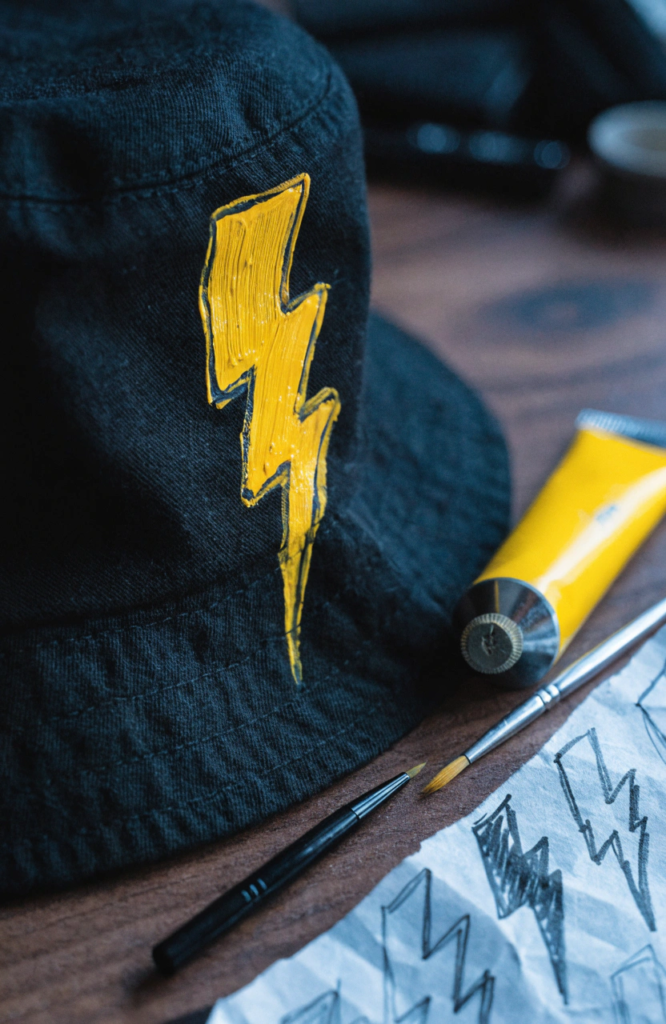
One bold jagged shape on the side of the crown adds a punchy graphic element without needing to cover much surface area.
Materials: fabric paint (yellow or your choice, black outline optional), fine brush, cardboard insert
Steps:
- Lightly sketch a jagged lightning bolt shape on the side of the crown.
- Fill it in solidly with your main color.
- Once dry, add a thin black or contrasting outline around the edges if you want extra pop.
- Clean up any rough points along the zigzag with a fine brush.
- Let dry and heat-set.
6. Butterfly Trio
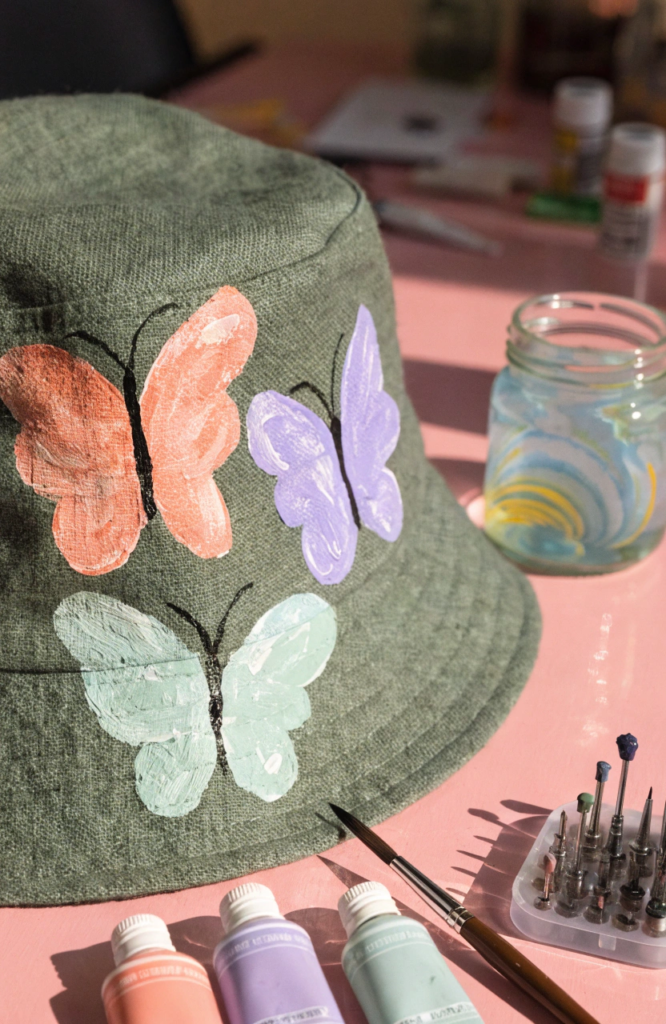
Three small butterflies at varied sizes scattered across the crown feel light and a little whimsical without much technical painting involved.
Materials: fabric paint (2 to 3 colors, black for detail), fine brush, cardboard insert
Steps:
- Paint two small teardrop-shaped wings on each side of a thin body line for your first butterfly.
- Repeat at two more spots on the crown, varying the size and color of each one.
- Once dry, add thin black lines dividing each wing for detail.
- Dot a few tiny black antennae onto each butterfly’s head.
- Let dry and heat-set.
7. Peace Sign Patch
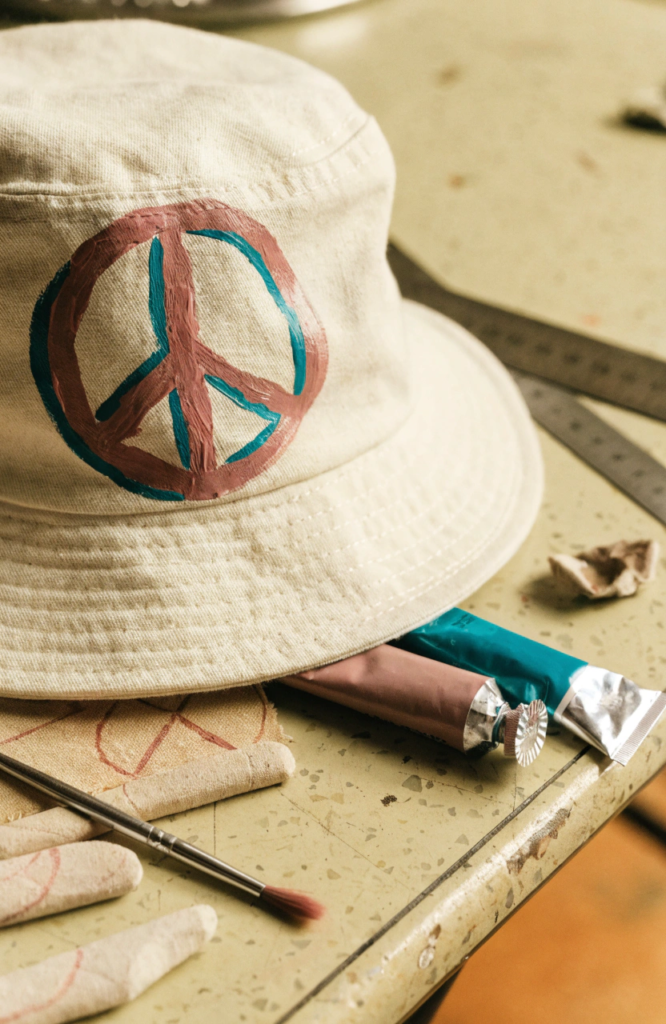
A classic, and genuinely one of the simplest shapes to paint once you’ve got the circle and lines placed.
Materials: fabric paint (2 colors), pencil or fabric chalk, fine brush, cardboard insert
Steps:
- Lightly sketch a circle on the crown with a vertical line through the center and two diagonal lines forming a “Y” from the middle to the bottom edge.
- Paint the circle outline and the three interior lines in your main color.
- Fill in the background inside the circle with a contrasting color if you want a bolder patch look.
- Clean up the circle’s edge with a fine brush for a crisp line.
- Let dry and heat-set.
8. Citrus Wedge Band
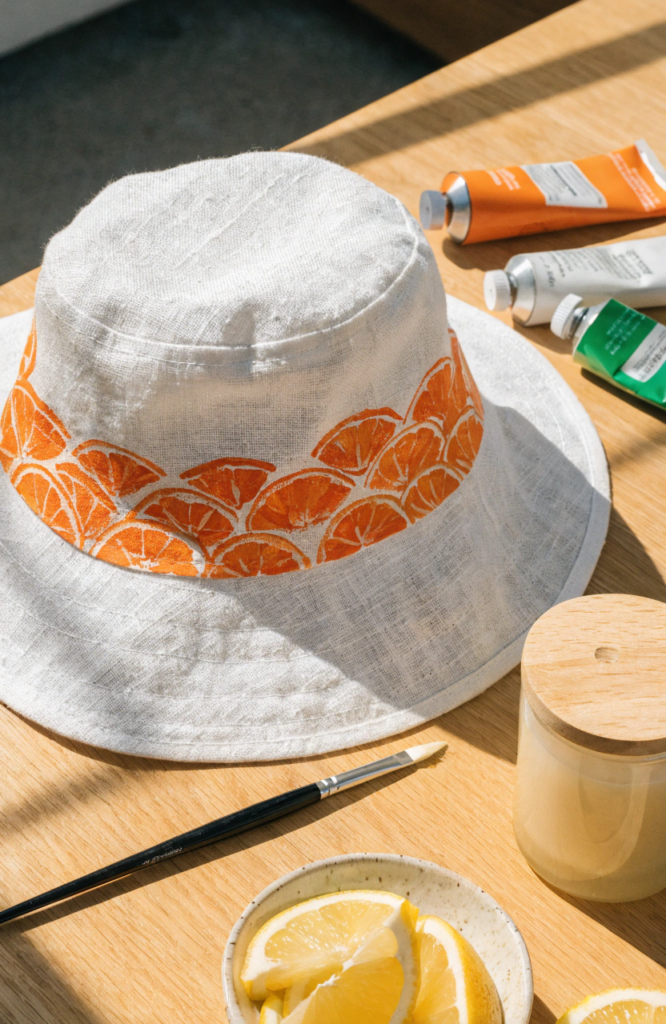
A row of little citrus wedges running around the base of the crown looks fresh and summery without needing much precision.
Materials: fabric paint (orange or yellow, white, small amount of green), fine brush, cardboard insert
Steps:
- Paint a row of small wedge shapes around the base of the crown, evenly spaced.
- Fill each wedge with orange or yellow.
- Add thin white pith lines radiating out from the center point of each wedge.
- Paint a small green rind edge along the curved outer side of each wedge.
- Let dry and heat-set.
9. Flame Lick Edge
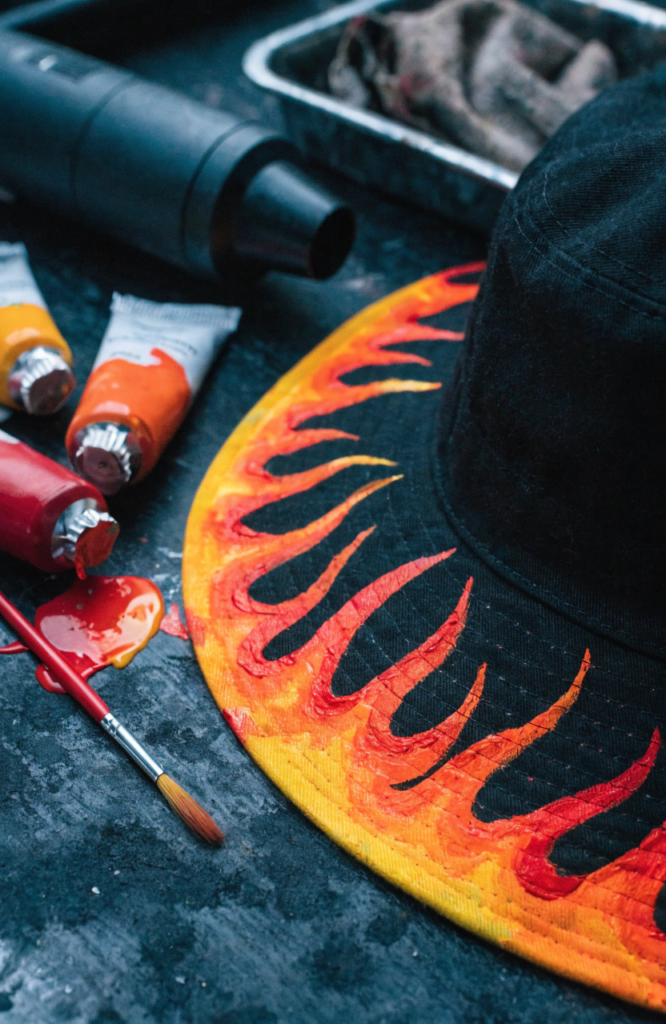
Running a row of small flame shapes along the brim’s edge gives the hat an edgier, retro biker feel.
Materials: fabric paint (red, orange, yellow), fine brush, cardboard insert
Steps:
- Lightly sketch a row of pointed flame shapes along the outer edge of the brim.
- Paint the base of each flame red and let it dry slightly.
- Layer orange over the middle section of each flame, then yellow near the tips.
- Blend the color transitions lightly while the paint is still workable.
- Let dry and heat-set.
10. Smiling Sun Patch
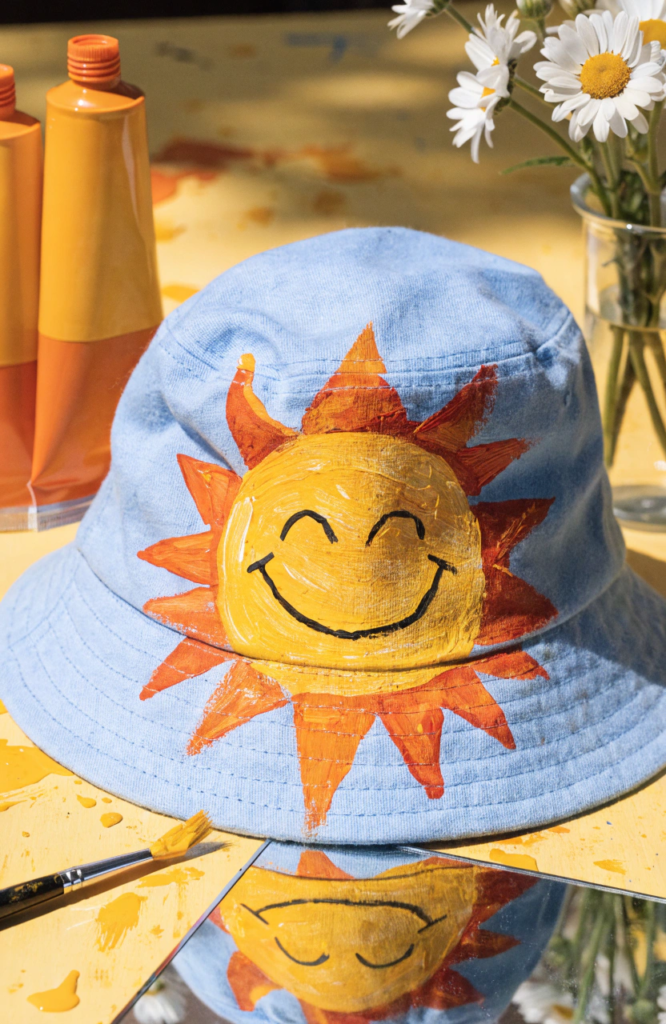
A simple round sun with a face and a few short rays is an easy way to bring some warmth to the front of the crown.
Materials: fabric paint (yellow, orange, black), fine brush, cardboard insert
Steps:
- Paint a solid yellow circle on the front of the crown.
- Add short orange triangle rays around the circle’s edge.
- Once dry, paint a simple black smiling face inside the circle.
- Add a touch of orange blush on the cheeks if you’re feeling cute about it.
- Let dry and heat-set.
11. Squiggle Trail Band
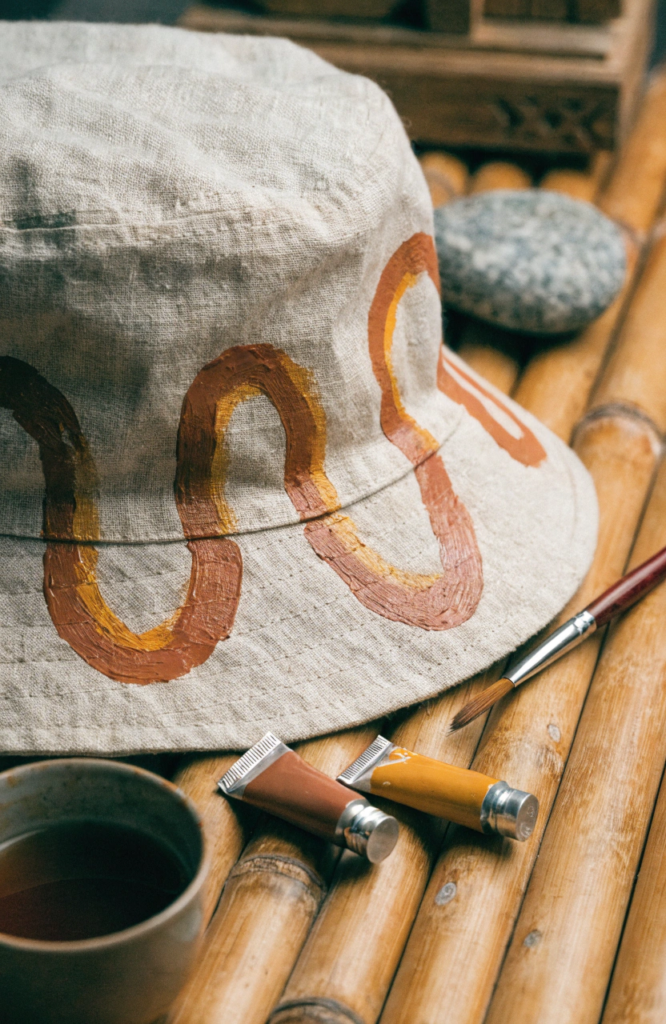
A loose, continuous squiggly line running around the base of the crown is one of the most relaxing designs to actually paint.
Materials: fabric paint (1 to 2 colors), fine brush, cardboard insert
Steps:
- Starting at one point on the crown, paint a continuous wavy line looping around the base.
- Keep the line moving in one direction without lifting your brush too often, so it stays fluid.
- Once dry, add a second thinner line in a different color running alongside the first.
- Dot a few small accent marks along the line if you want extra texture.
- Let dry and heat-set.
12. Tiny Frog Patch
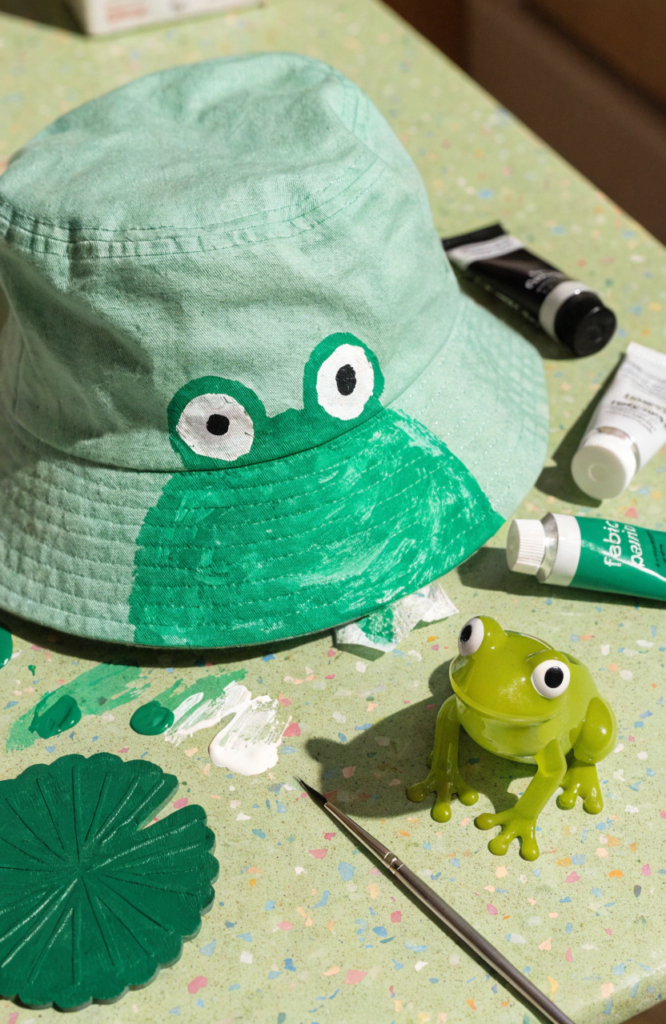
A small round frog face tucked onto the brim is silly in the best way, and the shapes are all just circles and ovals.
Materials: fabric paint (green, white, black), fine brush, cardboard insert
Steps:
- Paint a rounded oval shape in green for the frog’s head.
- Add two small white circles near the top for eyes, slightly overlapping the head shape.
- Dot black pupils inside each white circle.
- Paint a simple curved black smile beneath the eyes.
- Let dry and heat-set.
13. Heart Confetti Scatter
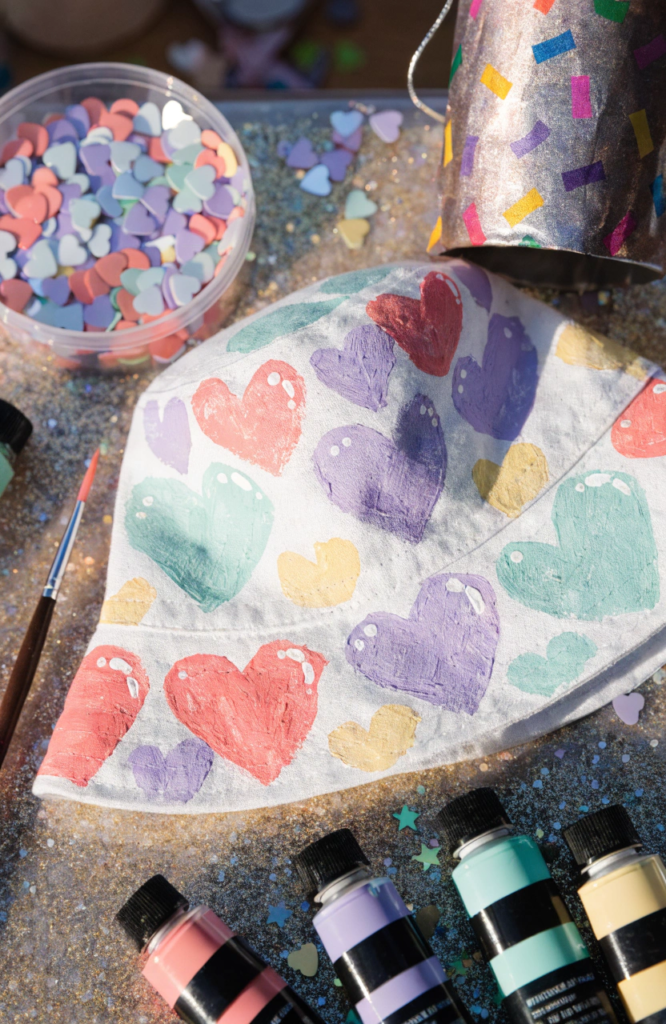
Small hearts in a handful of colors scattered loosely across the crown feel festive without looking like a themed costume.
Materials: fabric paint (3 to 4 colors), fine brush, cardboard insert
Steps:
- Paint small heart shapes scattered across the crown, rotating the angle of each one.
- Vary the size a little so some hearts feel closer and some feel farther away.
- Cycle through your colors so no two neighboring hearts match.
- Add a tiny white highlight dot on a few hearts for shine.
- Let dry and heat-set.
14. Palm Leaf Silhouette
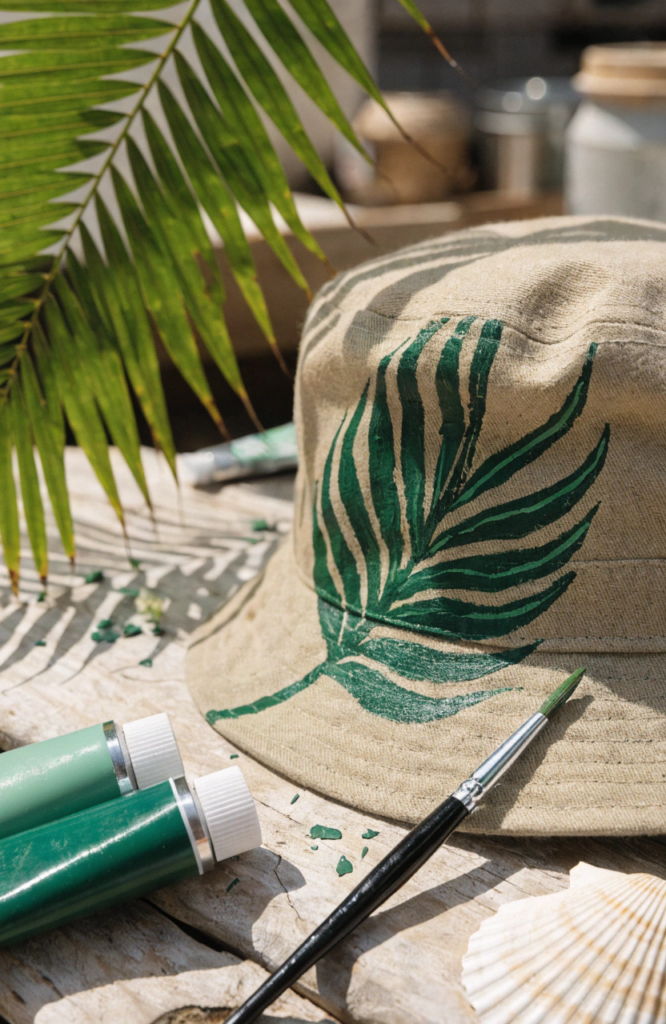
A single large leaf shape trailing across the side of the hat brings a breezy, vacation feel without much color mixing.
Materials: fabric paint (dark green, lighter green for veins), fine brush, cardboard insert
Steps:
- Sketch a long curved stem running diagonally across the side of the crown.
- Paint pointed leaf blades branching off the stem at even intervals.
- Fill each blade with dark green.
- Once dry, add a thin lighter green vein line down the center of each blade.
- Let dry and heat-set.
15. Faux Stitch Trim
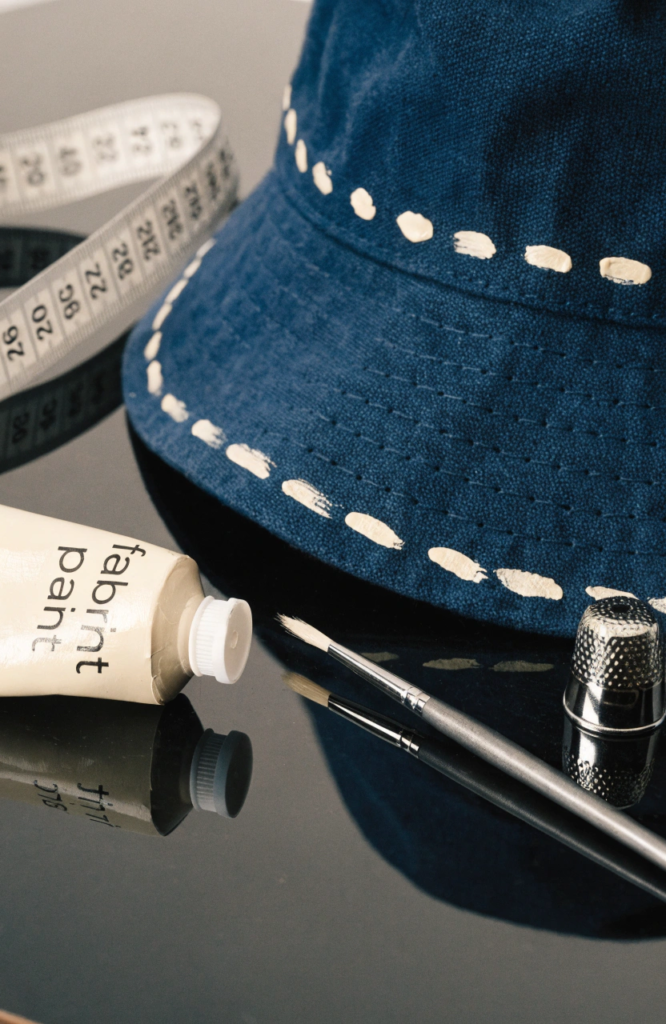
This one fakes the look of decorative stitching along the brim’s edge, and it’s a nice subtle option if you want something less bold than the other designs here.
Materials: fabric paint (a color that contrasts your hat), fine liner brush
Steps:
- Lightly mark a line running parallel to the brim’s edge, about half an inch in.
- Paint short evenly spaced dashes along that line to mimic a running stitch.
- Keep the dash length and spacing as consistent as you can for a clean look.
- Repeat the same dashed line around the base of the crown if you want it to match.
- Let dry and heat-set.
16. Paisley Swirl Patch
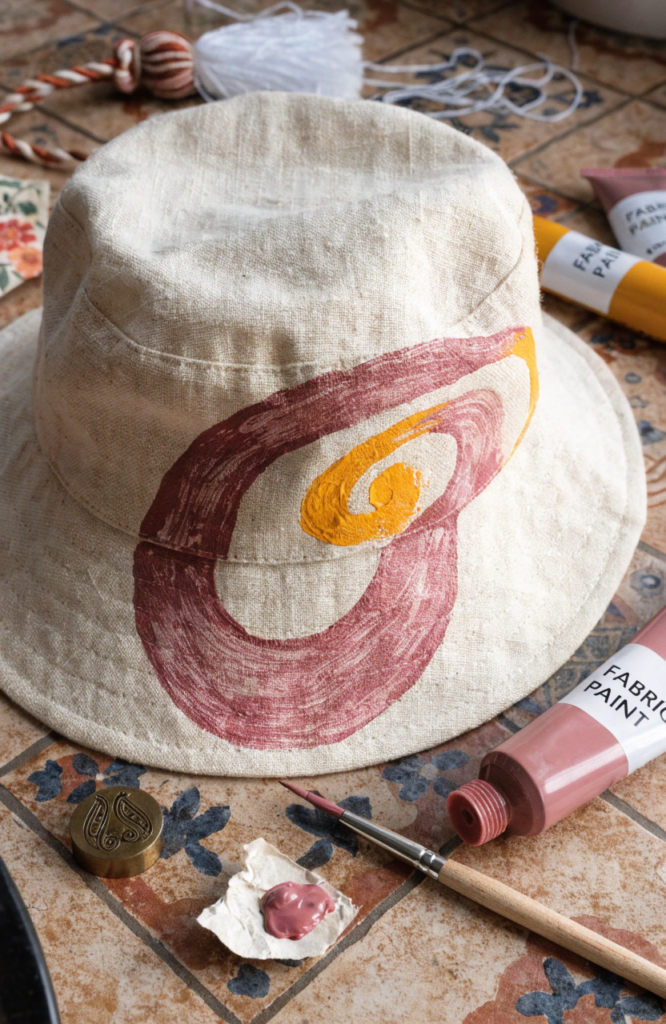
A single paisley teardrop shape with some detail inside makes a nice focal point on the front of the crown.
Materials: fabric paint (2 colors), fine brush, cardboard insert
Steps:
- Paint a large curved teardrop shape with a tail that curls at the bottom.
- Let it dry, then add a smaller matching teardrop outline just inside the first one in a second color.
- Fill the space between the two outlines with small dots or short dashes.
- Add one or two tiny accent dots near the curled tail.
- Let dry and heat-set.
17. Groovy Wave Band
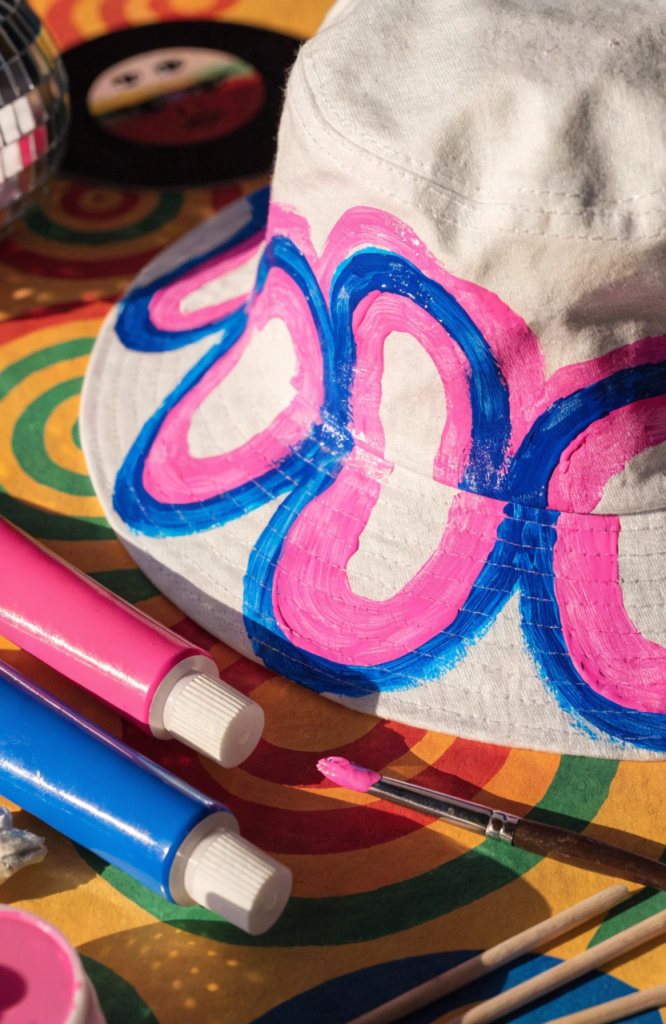
Thick ribbon-like waves running around the base of the crown bring a retro seventies feel that pairs well with a bold single color.
Materials: fabric paint (1 to 2 bold colors), fine brush, cardboard insert
Steps:
- Lightly sketch a thick wavy ribbon shape wrapping around the base of the crown.
- Fill the ribbon shape solidly with your main color.
- Once dry, add a thin outline in a second color along one edge of the ribbon for dimension.
- Touch up any spots where the wave’s curve looks uneven.
- Let dry and heat-set.
18. Tiny Bow Scatter
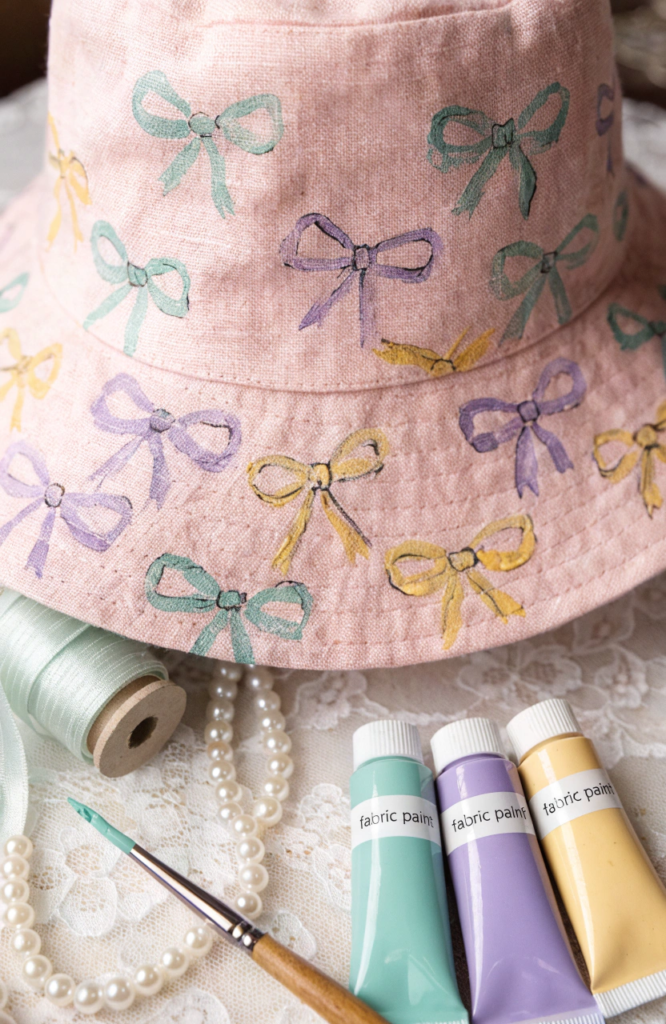
A handful of small ribbon bows scattered across the crown gives the hat a sweeter, more decorative feel than most of the bolder designs on this list.
Materials: fabric paint (2 to 3 soft colors), fine brush, cardboard insert
Steps:
- Paint two small triangle loops facing each other with a tiny knot shape in the middle for your first bow.
- Repeat at a few more spots across the crown, varying the color and size each time.
- Once dry, add a thin darker outline around each bow for definition.
- Add a couple of short ribbon tails hanging beneath a few of the bows.
- Let dry and heat-set.
Wearing Your Finished Hat
Give the paint a full 24 hours to cure before wearing the hat, even after heat-setting, just so nothing transfers onto your hands or hair on the first outing. When it does need a wash down the line, hand wash it gently and skip the dryer, since heat and tumbling are what wear painted fabric down fastest. Beyond that, just wear it. A painted bucket hat is one of those crafts that actually gets more charming the more it gets used.