The scent of yeast and warm flour is the perfect way to welcome a quiet Sunday morning. And this homemade white bread is a great loaf for all occasions, big or small. It’s so simple, comforting and very delicious!
I’m always so excited to see that golden, crusty loaf emerge from my oven each weekend. Sunday is my most favorite day to bake, and homemade bread is one of my most favorite kitchen rituals. It’s pure magic!
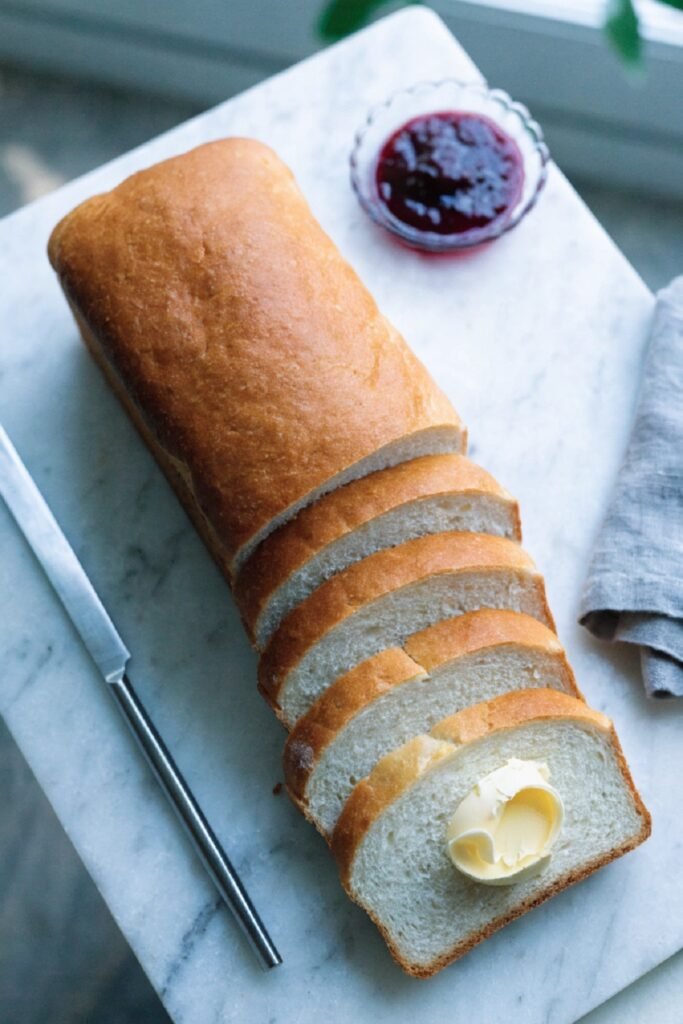
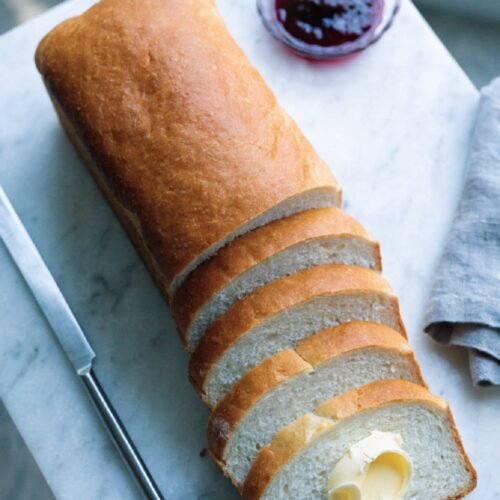
This white bread recipe is a delightful combination of soft and crisp textures, with simple pantry staples baked into a perfectly fluffy loaf. The outside develops a satisfying, gentle crackle in the oven, creating a beautiful and delicious centerpiece once it reaches your table.
Why You’ll Love This Recipe
This homemade white bread is the ultimate staple that elevates every meal, from morning toast to evening sandwiches, with its unbeatable freshness and aroma.
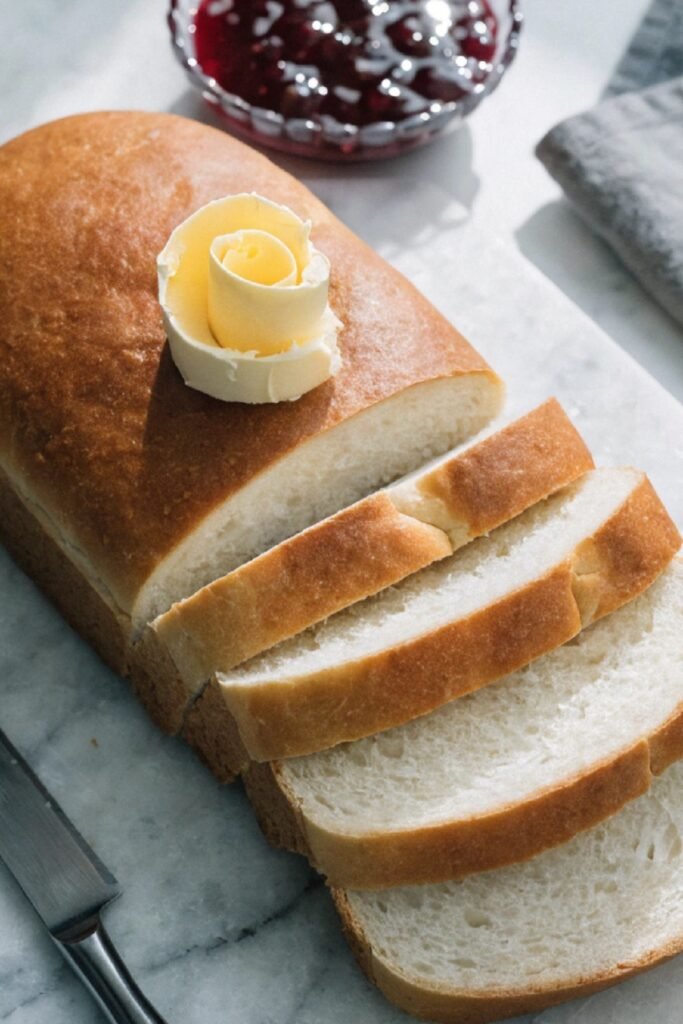
Incredibly soft texture: The crumb is pillowy, tender, and airy, making it perfect for slicing thin or tearing apart warmly.
Simple, clean ingredients: You only need flour, water, yeast, salt, sugar, and a touch of fat, avoiding any preservatives or additives found in store-bought loaves.
Versatile kitchen staple: It works beautifully for sandwiches, French toast, breadcrumbs, or simply slathered with butter and jam.
Cost-effective: Making bread at home is significantly cheaper than buying high-quality artisanal loaves from the bakery.
Therapeutic process: Kneading and shaping the dough is a mindful, stress-relieving activity that connects you to the food you eat.
Freezer-friendly: You can bake multiple loaves and freeze them, ensuring you always have fresh-tasting bread on hand with minimal effort.
Ingredients
For the Dough:
- 3 ½ to 4 cups all-purpose flour (plus extra for dusting)
- 1 packet (2 ¼ teaspoons) active dry yeast
- 1 ¼ cups warm milk (about 110°F/43°C, not hot)
- 2 tablespoons unsalted butter, melted and slightly cooled
- 2 tablespoons granulated sugar
- 1 ½ teaspoons fine sea salt
- 1 large egg, room temperature (optional, for richer color and texture)
For the Egg Wash (Optional):
- 1 large egg beaten with 1 tablespoon water
For Finishing:
- 1–2 tablespoons unsalted butter, melted (for brushing)

Step-by-Step Instructions
1. Activate the Yeast
In a small bowl or measuring cup, combine the warm milk, sugar, and yeast, stirring gently to dissolve. Let the mixture sit for 5–10 minutes in a warm, draft-free spot until it becomes foamy and bubbly, indicating that the yeast is alive and active. If it doesn’t foam, your yeast may be old, and you should start over with a fresh packet to ensure the bread rises properly.
2. Mix the Dough
In a large mixing bowl or the bowl of a stand mixer fitted with a dough hook, combine the flour and salt. Make a well in the center and pour in the foamy yeast mixture, melted butter, and the egg if using. Mix on low speed or with a wooden spoon until the ingredients come together into a shaggy, sticky mass, ensuring all the flour is incorporated from the sides of the bowl.
3. Knead Until Smooth
Turn the dough out onto a lightly floured surface and knead by hand for 8–10 minutes, or use the stand mixer on medium-low speed for 5–7 minutes. The dough is ready when it is smooth, elastic, and slightly tacky but not sticky, passing the “windowpane test” where you can stretch a small piece thin enough to see light through it without tearing.
4. First Rise (Bulk Fermentation)
Lightly grease a large bowl with oil or butter, place the dough inside, and turn it once to coat the top. Cover the bowl with plastic wrap or a damp kitchen towel and let it rise in a warm, draft-free area for 1–1.5 hours, or until it has doubled in size. This slow fermentation develops the flavor and texture, so be patient and avoid rushing this crucial step.
5. Shape the Loaf
Punch down the risen dough gently to release any large air bubbles, then turn it out onto a lightly floured surface. Shape it into a tight log by folding the edges into the center and rolling it up, pinching the seams closed to create tension. Place the shaped loaf seam-side down into a greased 9×5-inch loaf pan, tucking the ends under for a neat appearance.
6. Second Rise (Proofing)
Cover the loaf pan with a clean kitchen towel or plastic wrap and let it rise again for 30–45 minutes, or until the dough crests about an inch above the rim of the pan. Preheat your oven to 375°F (190°C) during the last 15 minutes of rising to ensure it is fully heated when the bread is ready to bake, creating the best oven spring.
7. Bake to Golden Perfection
If using, brush the top of the loaf with the egg wash for a shiny, golden crust. Bake in the preheated oven for 30–35 minutes, rotating the pan halfway through for even browning. The bread is done when it is deep golden brown on top and sounds hollow when tapped on the bottom, or when an instant-read thermometer inserted into the center reads 190°F (88°C).
8. Cool and Brush with Butter
Remove the bread from the oven and immediately turn it out onto a wire cooling rack. Brush the top and sides generously with melted butter while it is still hot to soften the crust and add flavor. Let the loaf cool completely before slicing to prevent the crumb from becoming gummy, allowing the structure to set properly for the perfect slice.
Tips & Variations
- Ensure your milk is warm but not hot, as temperatures above 120°F can kill the yeast and prevent the bread from rising.
- Humidity affects flour absorption, so add flour gradually during kneading until the right texture is achieved, rather than adding it all at once.
- Add dried rosemary, thyme, or shredded cheddar cheese to the dough for a savory, aromatic loaf that pairs beautifully with soups.
- Substitute half of the all-purpose flour with whole wheat flour for a nuttier flavor and added fiber, though the texture will be slightly denser.
- For deeper flavor, place the shaped loaf in the refrigerator overnight for a slow second rise, then bake it straight from the fridge the next morning.
Serving Suggestions
Homemade White Bread is best enjoyed warm, slathered with high-quality salted butter or homemade jam for a simple, comforting snack. Use it to make classic turkey or ham sandwiches, where its soft texture complements the fillings without overpowering them, or tear it into pieces for a rustic bread basket at dinner.
When I have leftover slices, I love turning them into French toast or crispy croutons for salads. The mild flavor of the bread makes it a versatile canvas for both sweet and savory applications, and it pairs wonderfully with hearty soups, stews, or a simple bowl of olive oil and balsamic vinegar for dipping.
Frequently Asked Questions
Can I use instant yeast instead of active dry?
Yes, you can substitute instant yeast directly without activating it in water first. Simply mix it with the dry ingredients and proceed with the recipe, though the rising times may be slightly shorter.
Why didn’t my bread rise?
This is usually due to old or dead yeast, water that was too hot and killed the yeast, or a cold environment. Ensure your yeast is fresh and your rising area is warm and draft-free for the best results.
How do I store homemade bread?
Store the completely cooled loaf in a paper bag or bread box at room temperature for up to 3 days. Avoid plastic bags, which can trap moisture and make the crust soggy, unless you plan to freeze it.
Can I freeze this bread?
Absolutely. Slice the cooled loaf, wrap it tightly in plastic wrap and foil, and freeze for up to 3 months. Toast slices directly from frozen for the best texture and flavor.
Why is my bread dense?
Over-kneading, too much flour, or insufficient rising time can lead to a dense loaf. Measure flour accurately by spooning it into the cup, and allow enough time for the dough to double in size.
Can I make this without a stand mixer?
Yes, kneading by hand works perfectly. It requires more effort and time (about 10 minutes), but it gives you a better feel for the dough’s texture and ensures a great result with no special equipment needed.
Final Thoughts
Homemade White Bread is a timeless treasure that brings warmth, comfort, and satisfaction to any table, proving that the simplest foods are often the most rewarding to make. The process of transforming basic ingredients into a beautiful, fragrant loaf is a joyful experience that connects us to tradition and nourishment.
Homemade White Bread
Ingredients
For the Dough:
- 3 ½ to 4 cups all-purpose flour plus extra for dusting
- 1 packet 2 ¼ teaspoons active dry yeast
- 1 ¼ cups warm milk about 110°F/43°C, not hot
- 2 tablespoons unsalted butter melted and slightly cooled
- 2 tablespoons granulated sugar
- 1 ½ teaspoons fine sea salt
- 1 large egg room temperature (optional, for richer color and texture)
For the Egg Wash (Optional):
- 1 large egg beaten with 1 tablespoon water
For Finishing:
- 1 –2 tablespoons unsalted butter melted (for brushing)
Instructions
- Activate the Yeast: In a small bowl or measuring cup, combine the warm milk, sugar, and yeast, stirring gently to dissolve. Let the mixture sit for 5–10 minutes in a warm, draft-free spot until it becomes foamy and bubbly, indicating that the yeast is alive and active. If it doesn’t foam, your yeast may be old, and you should start over with a fresh packet to ensure the bread rises properly.
- Mix the Dough: In a large mixing bowl or the bowl of a stand mixer fitted with a dough hook, combine the flour and salt. Make a well in the center and pour in the foamy yeast mixture, melted butter, and the egg if using. Mix on low speed or with a wooden spoon until the ingredients come together into a shaggy, sticky mass, ensuring all the flour is incorporated from the sides of the bowl.
- Knead Until Smooth: Turn the dough out onto a lightly floured surface and knead by hand for 8–10 minutes, or use the stand mixer on medium-low speed for 5–7 minutes. The dough is ready when it is smooth, elastic, and slightly tacky but not sticky, passing the "windowpane test" where you can stretch a small piece thin enough to see light through it without tearing.
- First Rise (Bulk Fermentation): Lightly grease a large bowl with oil or butter, place the dough inside, and turn it once to coat the top. Cover the bowl with plastic wrap or a damp kitchen towel and let it rise in a warm, draft-free area for 1–1.5 hours, or until it has doubled in size. This slow fermentation develops the flavor and texture, so be patient and avoid rushing this crucial step.
- Shape the Loaf: Punch down the risen dough gently to release any large air bubbles, then turn it out onto a lightly floured surface. Shape it into a tight log by folding the edges into the center and rolling it up, pinching the seams closed to create tension. Place the shaped loaf seam-side down into a greased 9×5-inch loaf pan, tucking the ends under for a neat appearance.
- Second Rise (Proofing): Cover the loaf pan with a clean kitchen towel or plastic wrap and let it rise again for 30–45 minutes, or until the dough crests about an inch above the rim of the pan. Preheat your oven to 375°F (190°C) during the last 15 minutes of rising to ensure it is fully heated when the bread is ready to bake, creating the best oven spring.
- Bake to Golden Perfection: If using, brush the top of the loaf with the egg wash for a shiny, golden crust. Bake in the preheated oven for 30–35 minutes, rotating the pan halfway through for even browning. The bread is done when it is deep golden brown on top and sounds hollow when tapped on the bottom, or when an instant-read thermometer inserted into the center reads 190°F (88°C).
- Cool and Brush with Butter: Remove the bread from the oven and immediately turn it out onto a wire cooling rack. Brush the top and sides generously with melted butter while it is still hot to soften the crust and add flavor. Let the loaf cool completely before slicing to prevent the crumb from becoming gummy, allowing the structure to set properly for the perfect slice.